Save to Pinterest
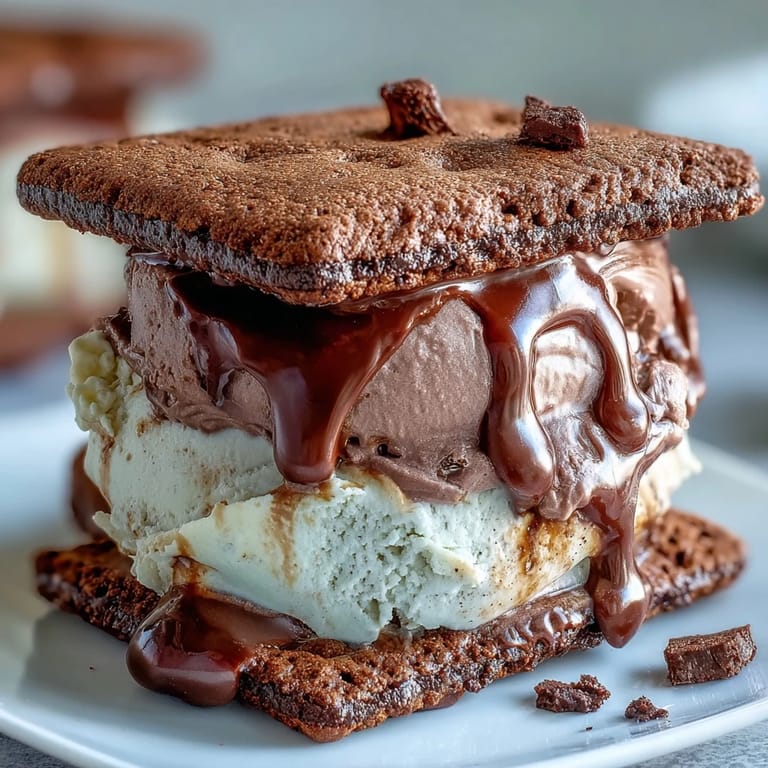
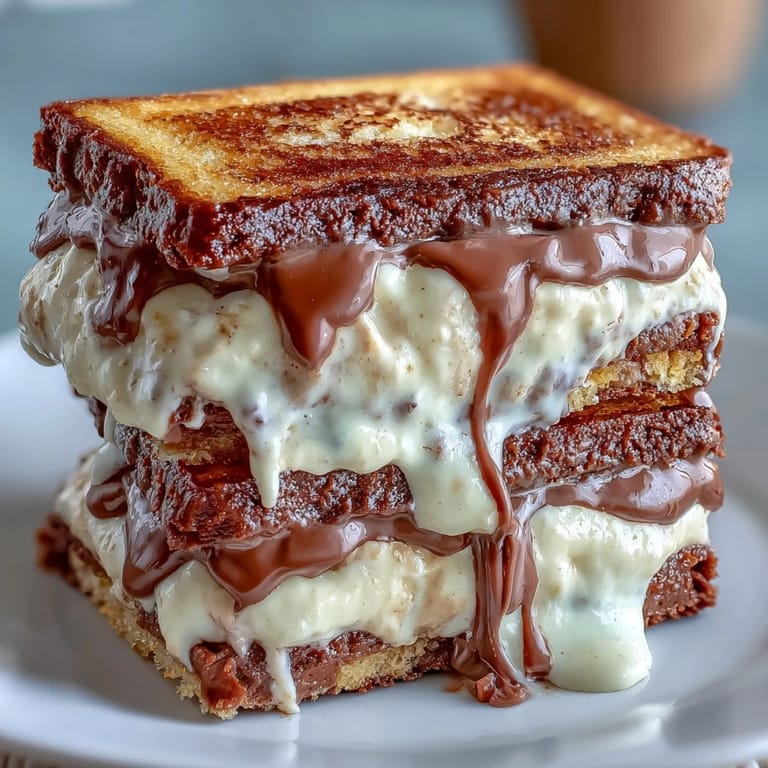
 There's something magical about catching that first drip of melted vanilla bean ice cream between two dark espresso cookies on a warm afternoon. My neighbor handed me one of these at a summer gathering, and I couldn't stop thinking about how she'd somehow bottled the essence of a frappuccino into something you could hold in your hand. The creamy sweetness of real vanilla bean against the subtle bitterness of espresso felt like a conversation between two flavors that were meant to find each other. I went home determined to figure out her secret, only to discover the real magic wasn't in any one ingredient but in the precision of bringing them together.
I made these for my book club last fall, and someone literally asked if I'd bought them from a bakery. That moment of mild deception—politely correcting them while they held one mid-bite—made me feel like a legitimate baker for the first time. My friend Sarah wanted the recipe immediately, and now she makes them for her kids' lunches frozen in foil, which somehow makes this feel less fancy and more real.
Ingredients
- Unsalted butter (1 cup, softened): Starting with softened butter makes creaming it with sugar so much easier and ensures your cookies have that tender crumb—cold butter fights you the whole way.
- Brown and granulated sugar (1 cup plus 1/2 cup): The brown sugar brings moisture and a slight caramel note while the granulated gives you spread and structure, and honestly neither one alone does the job right.
- Large eggs (2): Room temperature eggs mix in smoother and help bind everything without creating dense pockets of unmixed dough.
- Vanilla extract (2 tsp): This feels small but adds a warmth that makes people pause and ask what that flavor is underneath the espresso.
- All-purpose flour (2 1/2 cups): Measure by spooning and leveling, not scooping straight from the bag—I learned this the hard way with dense, thick cookies.
- Unsweetened cocoa powder (1/2 cup): The cocoa deepens everything and gives the cookies their sophisticated dark color without making them taste like chocolate desserts.
- Instant espresso powder (2 tbsp): This is where the frappuccino magic lives, so don't skip it or try to substitute with coffee grounds that won't dissolve evenly.
- Baking soda (1 tsp) and salt (1/2 tsp): Baking soda helps the cookies spread and set properly while salt amplifies every other flavor without tasting salty.
- Heavy cream (2 cups) and whole milk (1 cup): The ratio of cream to milk matters because too much cream makes the ice cream icy and too much milk makes it thin, so this balance is exactly right.
- Granulated sugar (3/4 cup) and vanilla bean: Real vanilla bean with those tiny black specks tastes infinitely better than extract, and the pod itself flavors the entire base as it steeps.
- Salt (pinch): A small amount of salt in the ice cream base rounds out the vanilla and makes it taste more complex than it has any right to.
Tired of Takeout? 🥡
Get 10 meals you can make faster than delivery arrives. Seriously.
One email. No spam. Unsubscribe anytime.
Instructions
- Start your vanilla bean base early:
- Combine your milk, sugar, scraped vanilla bean seeds, the pod itself, and salt in a medium saucepan and heat gently over medium heat until you see steam rising and the sugar has completely dissolved. The whole mixture should smell intensely vanilla-forward at this point, and you'll know you're not boiling it when small wisps of steam appear but you don't hear any bubbling sounds.
- Cool and chill the ice cream base:
- Remove from heat, fish out that vanilla pod with a spoon, and stir in your cold heavy cream—this brings down the temperature immediately and stops the cooking. Pop it in the fridge for at least two hours, preferably overnight, because cold base churns into silkier ice cream than warm base ever will.
- Churn into frozen dreams:
- Once your base is properly chilled, pour it into your ice cream maker and follow the manufacturer's timing, which usually takes about twenty to thirty minutes. The mixture should look like soft-serve consistency when it's done, so transfer it carefully to a parchment-lined 9x13-inch pan spread to about an inch thick and freeze solid for at least two more hours.
- Cream your butter and sugars together:
- In a large bowl using an electric mixer, beat softened butter with brown sugar and granulated sugar until the mixture looks pale, fluffy, and takes about three minutes of beating. This step incorporates air into your dough and ensures even texture throughout the cookies.
- Incorporate eggs and vanilla with care:
- Add eggs one at a time, beating well after each addition so they fully incorporate rather than sitting in oily puddles, then add vanilla extract and mix until everything looks smooth and unified. Don't rush this step because properly emulsified eggs and butter create the tender crumb you're after.
- Combine your dry ingredients separately:
- In another bowl, whisk together flour, cocoa powder, espresso powder, baking soda, and salt to distribute the leavening and espresso evenly. Whisking by hand prevents overworking the flour and ensures the espresso powder breaks up rather than creating dark specks of concentrated flavor.
- Bring wet and dry together gently:
- Add your dry mixture to the wet mixture gradually, stirring with a wooden spoon or mixer on low speed just until you don't see any white flour streaks anymore. Overmixing at this stage develops gluten and makes tough cookies, so stop as soon as everything is combined.
- Roll between parchment for easier handling:
- Divide the dough in half and place each half between two sheets of parchment paper, then use a rolling pin to flatten to about a quarter-inch thickness. Rolling between parchment keeps your hands clean and prevents sticking, and the parchment also helps you easily transfer the dough to your cutting station.
- Cut and bake with precision:
- Using a 3-inch round cutter, cut out sixteen cookies and place them on parchment-lined baking sheets, then bake at 350°F for ten to twelve minutes until the edges look set but the centers still feel slightly soft. They'll continue cooking on the pan as they cool, so pulling them out slightly underbaked ensures they stay chewy rather than becoming hard.
- Cool completely before assembly:
- Let cookies cool on the baking sheet for five minutes, then transfer to a wire rack and let them reach room temperature completely. Warm cookies against cold ice cream create condensation and melting, so patience here prevents soggy sandwiches.
- Cut and sandwich your ice cream:
- Remove your frozen ice cream slab from the freezer and cut out eight rounds using that same 3-inch cutter, working quickly so the ice cream doesn't soften too much. Place each round between two cookies, press gently together, and wrap in parchment, then freeze for at least an hour before serving.
 Save to Pinterest
 My daughter asked why I kept making these when store-bought ice cream sandwiches existed, and I realized I couldn't quite explain the feeling of watching someone's eyes light up when they bit into homemade vanilla bean ice cream against espresso-cocoa cookies. It's not just better, it's a small act of care shaped like dessert.
The Secret to Espresso Cookies That Actually Taste Like Espresso
Most chocolate cookies with espresso powder taste muddy, like the two flavors are fighting for attention instead of dancing together. The key here is the cocoa powder, which gives you chocolate's sophistication without chocolate's heaviness, while the espresso powder has room to shine through and remind you of that creamy frappuccino you're trying to capture. When I first made these, I used too much cocoa and too little espresso, and they tasted like generic chocolate cookies—the reversal of proportions changed everything.
Why Real Vanilla Bean Matters More Than You Think
Vanilla bean paste exists for a reason, and if you can't find actual vanilla beans, paste does almost the same thing as whole beans, but there's something about those tiny black specks suspended in your ice cream that makes people slow down and notice. Real vanilla bean releases subtle floral notes as it steeps in warm milk that extract alone simply can't match, and once you taste the difference, going back feels like a compromise. If you're making this for someone special or serving it at a gathering, this is where splurging on the real thing pays off in compliments.
No Ice Cream Maker? Here's What Actually Works
An ice cream maker isn't required if you're willing to be patient and remember to stir every thirty minutes or so as your base freezes. The texture won't be quite as silky as machine-churned, but it'll still be creamy and delicious, just slightly more crystalline, which honestly no one minds once they bite into the cookie. You can also substitute store-bought vanilla bean ice cream entirely if you're short on time, though homemade feels like the whole point of this project.
- If stirring every thirty minutes sounds annoying, know that you can also freeze the base for two hours, break it into chunks, blend it smooth in a food processor, and refreeze—it works surprisingly well.
- Softening your store-bought ice cream slightly and spreading it into the pan also works if you're really in a hurry, and no one will ever know.
- The cookies are honestly the star anyway, so using quality store-bought ice cream doesn't diminish the achievement here.
 Save to Pinterest
 These sandwiches sit in your freezer like little gifts to your future self, waiting for an afternoon when you need something special or a moment when someone stops by unexpectedly. That's really the whole story.
Common Recipe Questions
- → How do I infuse vanilla flavor into the ice cream base?
Heat the milk with vanilla bean seeds and pod until sugar dissolves and mixture steams, then remove the pod and mix in heavy cream before chilling.
- → What gives the cookies their espresso flavor?
The addition of instant espresso powder combined with cocoa powder enriches the cookies with a deep, bold coffee taste.
- → Can I make the ice cream without an ice cream maker?
Yes, freeze the base in a shallow dish and stir every 30 minutes until thick and creamy to mimic churning.
- → How should the assembled sandwiches be stored before serving?
Wrap each sandwich in parchment paper and freeze for at least one hour to firm up the layers.
- → Any tips for adding texture to the sandwiches?
Roll edges in mini chocolate chips or crushed espresso beans before freezing for an extra crunch.