 Save to Pinterest
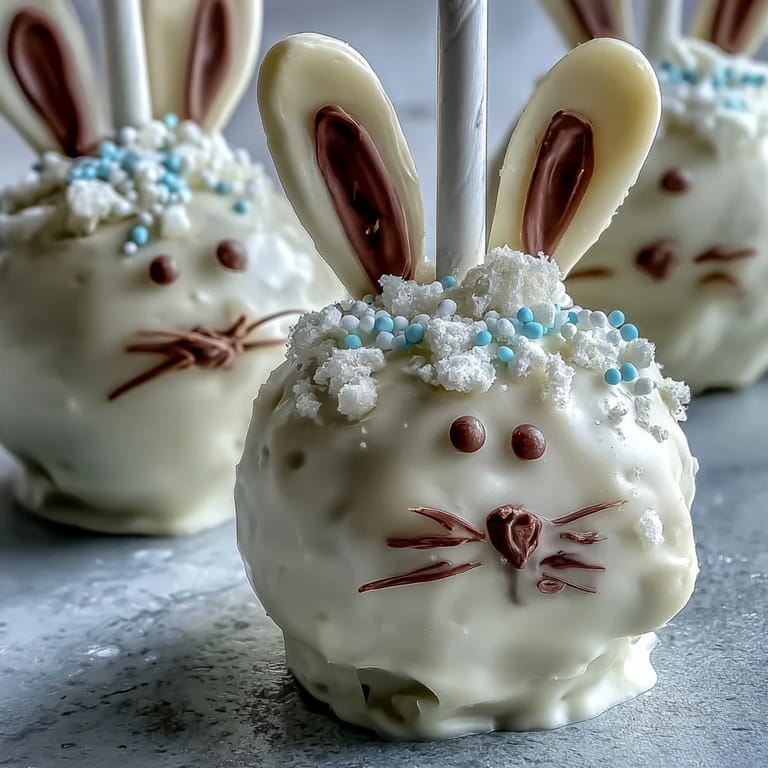
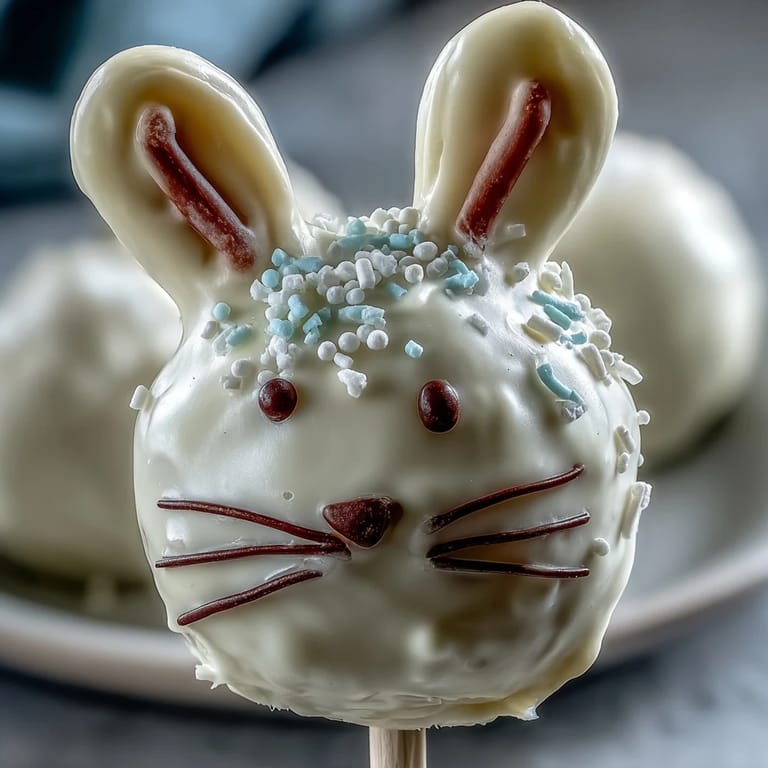
 These Easter Bunny Cake Pops are the perfect combination of whimsy and deliciousness, transforming simple cake into adorable springtime treats. Coated in smooth white chocolate and decorated with pink candy ears and fluffy marshmallow tails, these cake pops capture the charm of Easter in every bite. Whether you're hosting an Easter brunch, looking for a fun activity with kids, or simply want to bring a smile to someone's face, these bunny cake pops are guaranteed to delight.
Save to Pinterest The magic of cake pops lies in their versatility and the joy they bring to both makers and eaters. These Easter Bunny Cake Pops start with a moist vanilla or funfetti cake that's crumbled and mixed with a creamy cream cheese frosting, creating a rich, truffle-like texture. The addition of white chocolate coating not only adds a delicious layer of sweetness but also provides the perfect canvas for your creative bunny decorations. Each pop becomes a tiny edible sculpture, complete with pink ears, a sweet nose, and whiskers that bring personality to every bunny.
Ingredients
Tired of Takeout? 🥡
Get 10 meals you can make faster than delivery arrives. Seriously.
One email. No spam. Unsubscribe anytime.
- Cake: 1 box (about 400 g) vanilla or funfetti cake mix (or homemade equivalent), plus ingredients required for cake mix (usually eggs, oil, water as specified on box)
- Frosting: 100 g (about 1/2 cup) cream cheese, softened; 60 g (about 1/4 cup) unsalted butter, softened; 120 g (1 cup) powdered sugar; 1/2 tsp vanilla extract
- Coating & Decoration: 400 g (14 oz) white chocolate melting wafers or candy melts; 24 lollipop sticks; pink candy melts or colored chocolate for ears and noses; edible black food marker or melted dark chocolate for eyes and whiskers; mini marshmallows (for tails, optional); rainbow sprinkles or pastel confetti (optional)
Instructions
- Step 1: Bake the Cake
- Preheat oven and bake the cake as directed on the box or by your homemade recipe. Let it cool completely.
- Step 2: Make the Frosting
- In a medium bowl, beat together the cream cheese, butter, powdered sugar, and vanilla extract until smooth.
- Step 3: Mix Cake and Frosting
- Crumble the cooled cake into a large bowl, then mix in the frosting a little at a time until the mixture holds together and is moist but not soggy.
- Step 4: Shape the Bunny Heads
- Portion out 24 even pieces and roll each into a ball. Shape each ball into a slight oval for the bunny head.
- Step 5: Chill the Cake Balls
- Place cake balls on a baking sheet lined with parchment paper and freeze for 20 minutes.
- Step 6: Prepare the Coating
- Melt white chocolate wafers according to package instructions.
- Step 7: Insert Sticks
- Dip the tip of each lollipop stick into the melted chocolate, then insert halfway into each cake ball (this helps secure the stick).
- Step 8: Coat the Cake Pops
- Dip each cake pop into the melted white chocolate, gently tapping off excess. Place upright in a styrofoam block or cake pop stand to set.
- Step 9: Add Decorations
- While the coating is still wet, attach pink candy melts or colored chocolate for ears (cut into ear shapes if needed). Add a small piece of mini marshmallow for the tail.
- Step 10: Draw Features
- Once set, use an edible marker or melted dark chocolate to draw eyes and whiskers. Use pink candy or chocolate for the nose. Add sprinkles or confetti as desired.
- Step 11: Final Setting
- Allow cake pops to fully set before serving.
Zusatztipps für die Zubereitung
To make bunny ears, cut pink candy melts or use piped colored chocolate on wax paper and let harden before attaching. This ensures they hold their shape and stick properly to the cake pops. When working with melted chocolate, maintain the proper temperature—if it becomes too thick, add a small amount of vegetable oil to thin it out. Working in batches helps ensure the chocolate stays at the ideal consistency. Store cake pops in an airtight container in the refrigerator for up to 4 days, bringing them to room temperature about 15 minutes before serving for the best texture and flavor.
Varianten und Anpassungen
For a gluten-free version, use gluten-free cake mix and ensure all decorations are gluten-free. You can easily transform these into different characters by changing the ear colors and shapes—try brown chocolate for bears, or leave off the ears and add orange triangles for chicks. Experiment with different cake flavors like chocolate, lemon, or strawberry to create variety. For a more vibrant look, use colored candy melts instead of white chocolate, or add food coloring to white chocolate. You can also vary the decorations with different colored sprinkles, edible glitter, or even small fondant details.
Serviervorschläge
Display these Easter Bunny Cake Pops in a colorful arrangement on your dessert table by using a decorated styrofoam block covered with Easter grass or pastel tissue paper. They make wonderful party favors when wrapped individually in clear cellophane bags tied with ribbon. Arrange them in baskets alongside other Easter treats, or create a stunning centerpiece by placing them in a vase or decorative container. For an extra-special presentation, serve them on individual decorative plates with a sprinkle of pastel confetti around the base. These cake pops pair beautifully with fresh fruit, light spring beverages, or as the sweet ending to an Easter brunch.
 Save to Pinterest
 These Easter Bunny Cake Pops are more than just a dessert—they're an experience that brings joy to every step of the process. From mixing the cake and frosting to carefully decorating each little bunny face, creating these treats is a wonderful way to celebrate the season. The combination of moist cake, creamy frosting, and smooth white chocolate creates a texture that's both indulgent and delightful. Whether you're making them for a special celebration or simply to brighten someone's day, these adorable cake pops are sure to become a beloved Easter tradition in your home.
Common Recipe Questions
- → What type of cake works best for these bunny treats?
Vanilla or funfetti cake mix works perfectly due to their light texture and mild flavor, allowing the white chocolate coating and decorations to shine.
- → How do you make the bunny ears stay on the treats?
Create ears by hardening pink candy melts on parchment paper, then attach them while the white chocolate coating is still wet to ensure they stick firmly.
- → Can the coating be substituted for different flavors?
Yes, white chocolate can be swapped with milk or dark chocolate melts, but white chocolate enhances the pastel look ideal for Easter themes.
- → How should I store these decorated bunny pops?
Keep them in an airtight container in the refrigerator for up to four days to maintain freshness and coating stability.
- → Is it possible to make a gluten-free version?
Absolutely, use gluten-free cake mix and confirm that all decorative ingredients are gluten-free to accommodate dietary needs.
- → What is the best way to chill the shaped cake before coating?
Freeze the shaped cake balls on parchment paper for about 20 minutes to firm up the texture, which helps with a smooth coating application.