 Save to Pinterest
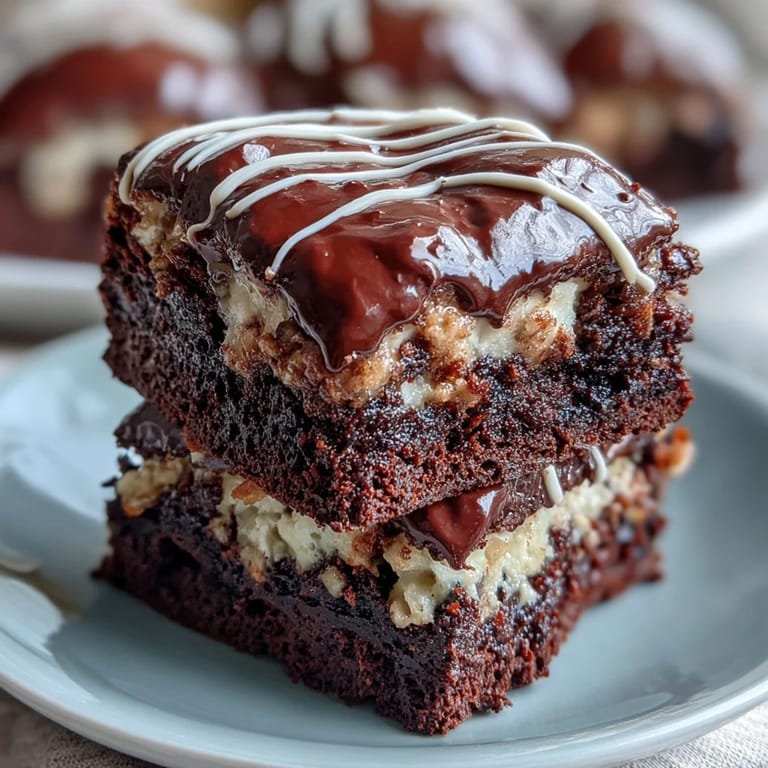
 My nephew's Little League team showed up at my kitchen door one Saturday afternoon, mud on their uniforms and disappointment written all over their faces—they'd lost their playoff game by two runs. I wanted to turn that day around, so I pulled out my mixing bowl and decided to bake something that would make them smile again. These brownie bites, decorated to look like tiny baseballs with their white icing laces, became the unexpected hero of the afternoon. The kids forgot about the loss within minutes, crowded around the cooling rack like it was home plate itself. That's when I realized these weren't just brownies—they were edible cheer.
I've made these for birthday parties, game day gatherings, and even a soccer tournament bake sale where they sold out in the first twenty minutes. What struck me most was watching a shy kid in the back of the line ask if he could buy an extra one because his friend was vegetarian and wanted to make sure he had something special to eat. That's the kind of moment that reminds you food does more than fill bellies.
Ingredients
- Unsalted butter (115 g or 1/2 cup): Melt this slowly with the chocolate—rushing it will cause the mixture to seize up and ruin everything, so patience here pays off.
- Semisweet chocolate chips (170 g or 1 cup): These create that deep, fudgy flavor that makes people close their eyes when they bite in; don't swap for milk chocolate unless you want something sweeter.
- Granulated sugar (150 g or 3/4 cup): This balances the chocolate's intensity and gives the brownies that tender crumb.
- Large eggs (2): Add them one at a time and whisk well—rushing this step means you'll end up with streaks of raw egg in your batter.
- Vanilla extract (1 tsp for batter, 1/4 tsp optional for icing): A tiny amount transforms everything by deepening the chocolate flavor without announcing itself.
- All-purpose flour (65 g or 1/2 cup): Less flour than traditional brownies keeps these impossibly fudgy; don't pack it into your measuring cup or you'll add too much.
- Salt (1/4 tsp): This seems insignificant until you leave it out and taste the difference—it's the secret that makes chocolate actually taste like chocolate.
- Powdered sugar (60 g or 1/2 cup for icing): Sift it if it's lumpy, otherwise you'll have grainy icing that won't pipe smoothly.
- Milk (1–2 tsp for icing): Add it gradually to get the consistency right; too much and your icing becomes runny, too little and it won't come out of the piping bag.
Tired of Takeout? 🥡
Get 10 meals you can make faster than delivery arrives. Seriously.
One email. No spam. Unsubscribe anytime.
Instructions
- Prepare your workspace:
- Preheat the oven to 175°C (350°F) and grease those mini muffin cups or line them with papers—this takes two minutes and saves you from brownie demolition when you try to remove them later.
- Melt chocolate and butter together:
- Combine them in a microwave-safe bowl and heat in 30-second bursts, stirring between each one until the mixture is smooth and glossy. This gentle approach prevents the chocolate from becoming grainy or burnt.
- Build the brownie batter:
- Whisk the sugar into the cooled chocolate mixture, then add eggs one at a time, whisking well after each addition so they incorporate fully. Stir in the vanilla extract until it's evenly distributed.
- Fold in flour and salt:
- Gently fold the flour and salt into the batter until just combined—overmixing develops gluten and turns your brownies tough and cakey instead of fudgy. A few visible streaks of flour are fine; stop there.
- Fill the muffin tin:
- Divide the batter evenly among the mini cups, filling each about 3/4 full because these brownies rise slightly and you want room for expansion. A small spoon or ice cream scoop makes this quick and even.
- Bake until almost underdone:
- Bake for 16–18 minutes, checking at the 15-minute mark by inserting a toothpick into the center—you're looking for moist crumbs, not a dry center. This is where most people overbake them, so trust your toothpick over the timer.
- Cool with patience:
- Let the brownies sit in the tin for 5 minutes (this helps them set and release cleanly), then transfer them to a wire rack to cool completely. Trying to decorate warm brownies will melt your icing, so give them time.
- Make the icing:
- Mix the powdered sugar with 1 teaspoon of milk and the optional vanilla extract, then add more milk slowly until you reach a thick but pipeable consistency. It should hold its shape when piped but not be so thick it cracks.
- Pipe the baseball laces:
- Transfer the icing to a piping bag fitted with a small round tip and pipe two curved lines across each brownie bite as the main seam, then add small perpendicular lines across those seams to mimic real baseball stitching. The imperfect lines look more authentic than perfect ones.
- Set and serve:
- Let the icing set for at least 10 minutes before serving or stacking—this prevents the laces from smudging onto other brownies.
 Save to Pinterest
 There was a moment during a neighborhood cookout when I watched someone take a bite of one of these and their whole face light up like they'd just witnessed a home run themselves. That's the exact moment I understood why I keep coming back to this recipe—it's not because they're complicated or impressive, but because they bring genuine joy to people, especially kids.
Making Them Look Perfect
The baseball decoration is forgiving, which is honestly the best part about this recipe. Your icing lines don't need to be perfectly symmetrical or even particularly neat—real baseballs have slightly wonky stitching, and yours should too. I've learned that embracing the imperfections actually makes them look more charming and authentic, and it takes the pressure off anyone helping with the decorating.
Storage and Make-Ahead Tips
These brownies sit happily in an airtight container at room temperature for up to three days, which means you can bake them the day before a party and decorate them in the morning. If you're really ahead of the game, you can even bake and freeze the un-decorated brownies for up to a month—just thaw them completely before piping on the icing.
Creative Variations and Customizations
Once you master the basic recipe, you can play around with what goes into the brownie itself and how you decorate it. I've added chocolate chips for extra fudginess, stirred in crushed peppermint candies for a holiday version, and even mixed a tablespoon of espresso powder into the batter for brownies that taste like a chocolate lover's dream. The canvas is yours to paint on.
- Use red food coloring in the icing for authentic-looking red baseball laces that pop against the dark chocolate.
- Sprinkle a tiny pinch of sea salt on top of the icing before it sets for a sweet-salty contrast that's unexpectedly addictive.
- Make them ahead and freeze for up to a month, pulling them out as needed for last-minute treats or emergency desserts.
 Save to Pinterest
 These brownie bites have become my go-to for any celebration, and they've earned a permanent spot on my rotation because they genuinely make people happy. There's something magical about turning a simple chocolate brownie into something that brings out the kid in everyone.
Common Recipe Questions
- → How do I achieve the fudgy texture in brownie bites?
Use a high ratio of chocolate and butter to flour, avoid overmixing the batter, and bake until moist crumbs remain on a toothpick. This ensures a dense, fudgy bite.
- → Can I add variations to the brownie bites?
Yes, you can fold in chocolate chips or nuts into the batter for added texture and flavor variety.
- → What’s the best way to pipe the icing laces?
Use a piping bag or a zip-top bag with a small tip. Pipe two curved lines first, then add perpendicular small lines for a realistic lace effect.
- → How should I store the brownie bites to keep them fresh?
Store in an airtight container at room temperature for up to three days to maintain freshness and texture.
- → Can the white icing be colored?
Yes, adding a few drops of red food coloring to the icing will create authentic-looking baseball laces.