 Save to Pinterest
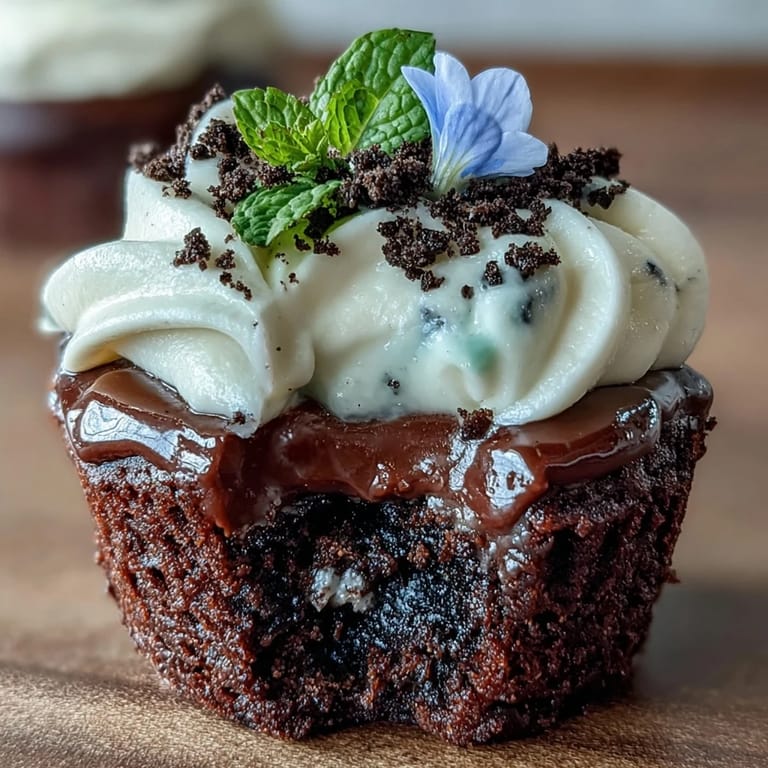
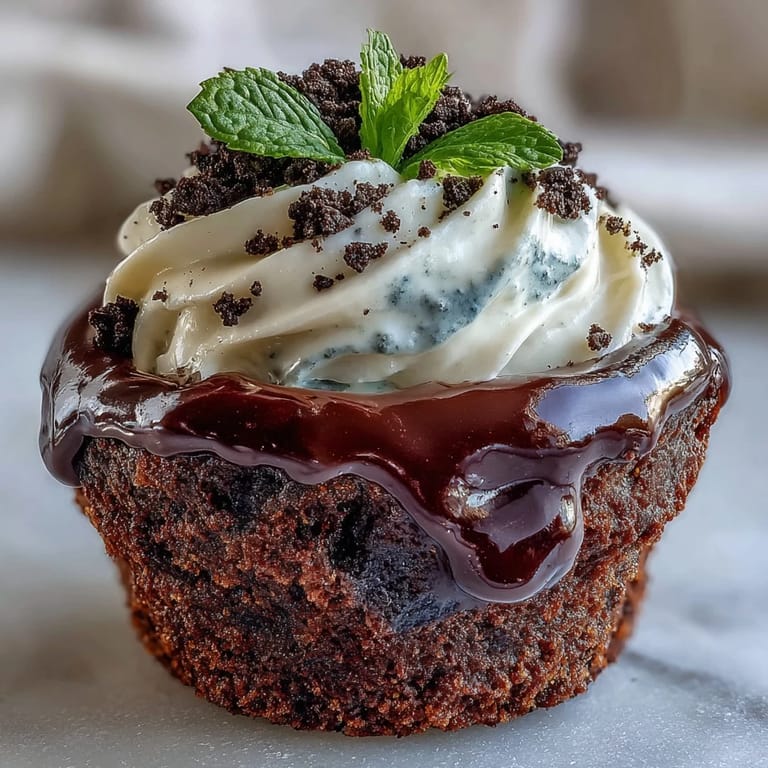
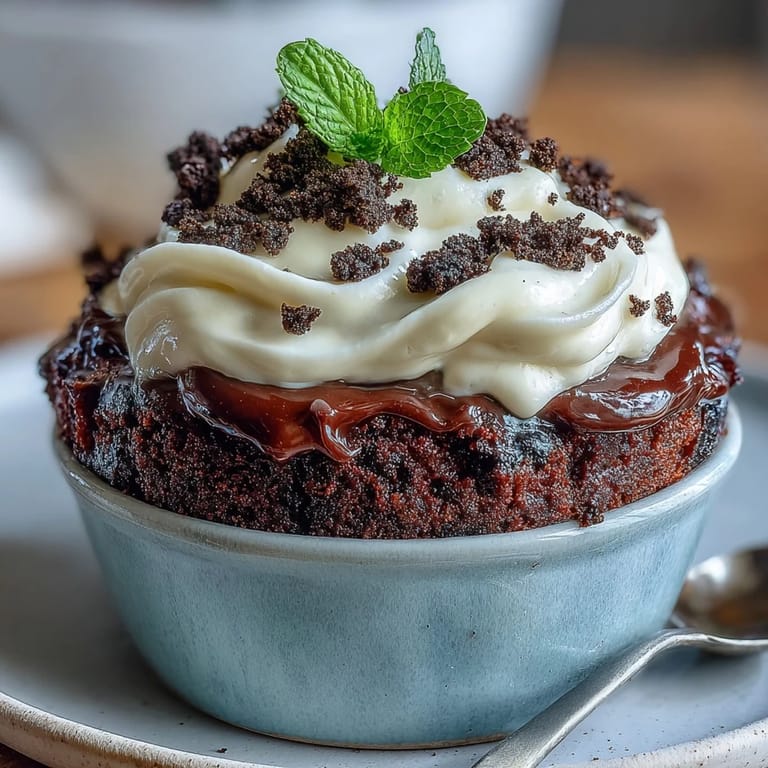
 The first time the aroma of rich chocolate and warm vanilla wafted from a batch of these flower pot brownies, my kitchen window was wide open and late spring sunlight tipped across the counter. There’s an unexpected delight in crushing Oreos to bits, feeling a little mischievous as I pretended to garden indoors. I still laugh recalling how my hands looked after arranging edible flowers—a few smudges of chocolate and an accidental snippet of mint tucked behind my ear. Sometimes, making something playful for Mother’s Day feels like channeling those childhood craft projects but with a sweet, grown-up twist. Every flower pot carries a cheerful secret—the promise that dessert can be beautiful, easy, and silly all at once.
I remember my sister joining in, laughing as we smoothed whipped cream over the cooled brownies and accidentally starting an impromptu competition for the best "garden." The kitchen was a gentle chaos of pastel petals and scattered crumbs, every pot adorned with creativity and just a bit of frosting in stray places. When we finally carried the finished pots to the table, my mom’s delighted surprise was the best finish. Sharing the results felt less like serving dessert and more like presenting tiny, edible bouquets you could actually eat. That afternoon became a sweet, messy memory we've repeated more than once since.
Ingredients
- Unsalted butter: Melting the butter gently brings out a deep flavor, and I’ve learned using real butter gives the brownies a rich crumb.
- Granulated sugar: A thorough whisk here helps create that shiny, crisp-edged top everyone loves in brownies.
- Large eggs: Adding one at a time ensures they blend smoothly, preventing streaky batter.
- All-purpose flour: Just the right structure—be sure to measure lightly for tender bites.
- Unsweetened cocoa powder: I reach for a good quality cocoa, as it’s the soul of the brownie’s chocolate hit.
- Baking powder: Just enough lift without losing that dense, fudgy texture.
- Salt: Don’t skip the salt; it balances all the sweetness brilliantly.
- Vanilla extract: That aromatic note really comes through, so I never go without it.
- Oreo cookies: Crushing the cookies—filling and all—makes for the unbeatable "dirt" effect that everyone tries to sneak extra of.
- Heavy cream: Whipped cream is like a light cloud against the richness, and chilling the bowl first makes for fluffier peaks.
- Powdered sugar: Just enough to sweeten the cream without overpowering the rest.
- Edible flowers or gummies: Tiny pansies or colorful gummies transform each pot into a cheerful mini garden, with each decoration a little unexpected treat.
- Fresh mint leaves (optional): The quick pop of green lifts the whole look—it’s especially lovely if you happen to have mint snipped from a windowsill plant.
Tired of Takeout? 🥡
Get 10 meals you can make faster than delivery arrives. Seriously.
One email. No spam. Unsubscribe anytime.
Instructions
- Prep the oven and pots:
- Set the oven to 175°C (350°F) and line your mini flower pots with parchment circles or use a tray if your pots are for serving only.
- Melt and mix:
- Let the butter melt slowly in a saucepan, then whisk in the sugar and vanilla until you get a glossy waterfall of sweetness.
- Incorporate eggs:
- Add eggs, one by one, mixing after each until the batter looks thick and glossy, almost like chocolate pudding.
- Combine dry ingredients:
- Sift together flour, cocoa powder, baking powder, and salt, then fold into the wet mixture gently—don’t overmix, or the brownies lose their soft texture.
- Fill and bake:
- Spoon the batter into each flower pot, filling them about halfway, or into a lined baking pan if using that.
- Bake the brownies:
- Bake for 20–25 minutes, checking for moist crumbs on a toothpick—too dry and they’ll lose their fudgy charm.
- Cool completely:
- Let the brownies rest until they’re not warm to the touch; rushed assembly is a recipe for melting cream.
- Make the dirt:
- Use a food processor or a good old zip bag and rolling pin to crush Oreos to dark, chunky soil.
- Whip the cream:
- Beat chilled cream and powdered sugar until stiff, snowy peaks stand tall—watch carefully, it changes fast.
- Assemble the pots:
- If you used a tray, cut brownies to fit; otherwise, spread a pillowy layer of whipped cream over each cooled brownie base.
- Sprinkle with Oreo soil:
- Shower crushed Oreos generously over the cream until you have a delicious mini flower bed.
- Add finishing touches:
- Decorate with edible flowers, playful gummies, and mint leaves—however your garden heart desires.
- Chill and serve:
- Pop them in the fridge until ready to serve; they’re best cool and set.
 Save to Pinterest
 When my niece gleefully bit into her "plant," giggling at chocolate crumbs on her lip, it was suddenly so much more than dessert—it was laughter shared and a sweet little moment tucked into our memory box. These flower pot brownies remind me that the messiest creations are often the most memorable.
Choosing and Caring for Edible Flowers
If you’re new to edible flowers, give them a gentle rinse and pat them dry right before assembling; it keeps the petals crisp and bright. Always check that they’re specifically grown for culinary use to avoid any nasties, and try storing delicate blooms in the fridge until you’re ready to decorate.
Shortcut Swaps for Busy Days
Some weeks, I reach for a brownie mix instead—no shame, just more time for decorating. Using pre-whipped cream from a can works in a pinch, but I admit nothing quite matches the real thing whipped fresh with just enough sugar.
Troubleshooting and Fun Variations
If a brownie batch turns out overly dense, crumble it up and make layered "mud cups"—honestly, no one complains. When I’m low on Oreos, chocolate graham crackers or any dark cookie still pull off that fun garden illusion perfectly.
- Keep a few extra cookies on hand; someone always wants an extra sprinkle.
- Swap in different flavored Oreos if you’re feeling adventurous.
- Don’t forget to double-check your flower pots are oven-safe before baking.
 Save to Pinterest
 However you decorate them, these flower pot brownies always bring out smiles and a bit of astonishment. May your kitchen be full of laughter, crumbs, and unexpected little bouquets of joy this Mother’s Day.
Common Recipe Questions
- → Can I bake the batter in a tray instead of flower pots?
Yes. Bake in a lined tray, let cool, then cut rounds or squares to fit mini pots. This is often faster and ensures even baking if you lack oven-safe pots.
- → How do I get the Oreo crumbs fine enough to look like soil?
Pulse cookies in a food processor until uniformly fine. Alternatively, place them in a sealed bag and crush with a rolling pin, then sift larger pieces out for a smoother 'dirt' texture.
- → What are tips for stable whipped cream topping?
Use very cold heavy cream and chill the mixing bowl. Add powdered sugar for sweetness and structure, and whip to stiff peaks. For longer hold, fold in a small amount of mascarpone or stabilized whipped cream powder.
- → Are edible flowers safe to use and how should I prepare them?
Only use flowers labeled as food-safe from reputable sources. Gently rinse and pat dry, remove stems if needed, and add just before serving to retain color and texture.
- → How far ahead can I assemble the pots?
Assemble up to a few hours ahead and refrigerate. Add delicate flowers right before serving to prevent wilting. If storing longer, keep crumbs and whipped topping slightly separated and combine before serving.
- → What are good variations for texture or flavor?
Fold chocolate chips or chopped nuts into the batter for crunch, swap crushed graham crackers for Oreos for a milder crumb, or add a hint of espresso to intensify the chocolate.