 Save to Pinterest
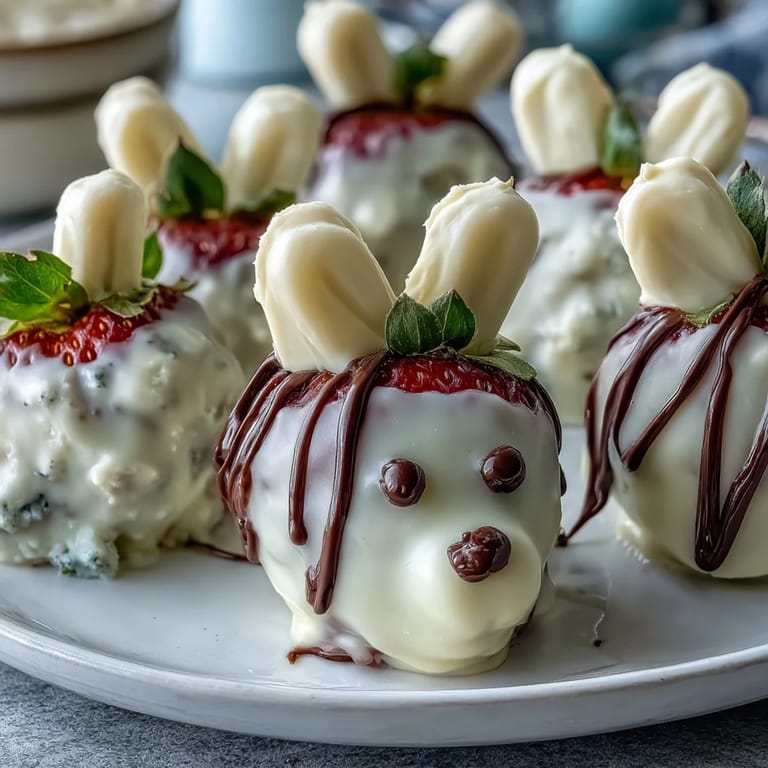
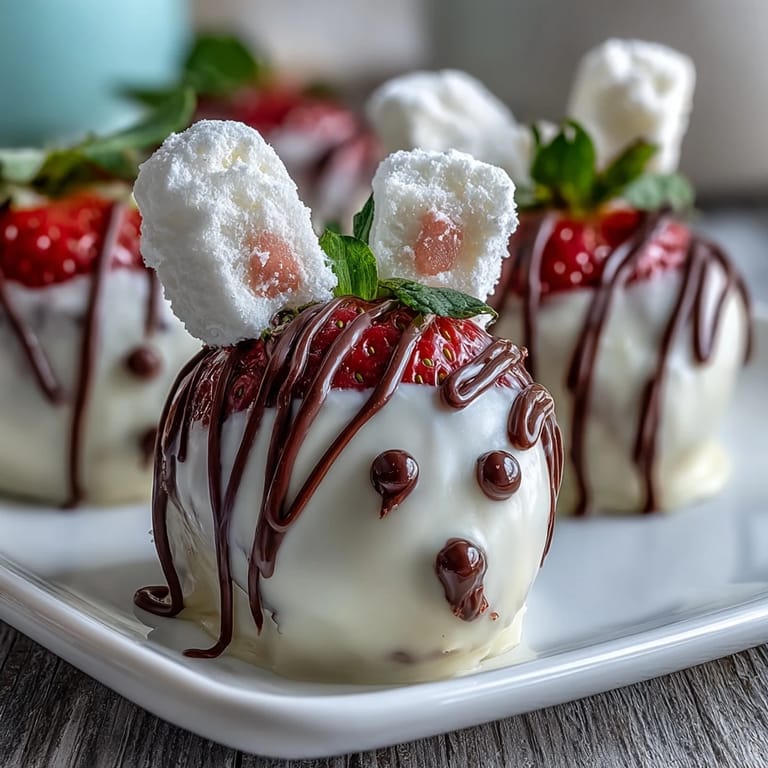
 My daughter burst into the kitchen last spring holding a magazine cutout of these strawberry bunnies, absolutely convinced we had to make them for Easter brunch. I was skeptical at first—chocolate-covered strawberries seemed simple enough, but bunny ears made from marshmallows? That sounded like a recipe for sticky chaos. Two hours later, we had a plate of the most charming little treats, and she'd already named each one. What started as a skeptical mom became a believer when I saw her friends' faces light up at the table.
Last Easter, my neighbor mentioned offhandedly that her in-laws were coming and she was nervous about dessert. I texted her a photo of these bunnies, and she showed up at my door twenty minutes later asking for the recipe. Watching her gain confidence as she decorated them in my kitchen—laughing when marshmallow pieces stuck to her fingers—turned into one of those unexpected afternoons you actually remember. Turns out making something beautiful together is its own kind of celebration.
Ingredients
- Large fresh strawberries (12): Choose ones that are firm and unblemished, with the stems still attached if possible—they become little bunny necks and make holding them easier when dipping.
- White chocolate (200 g, chopped): The chopping matters more than you'd think; smaller pieces melt faster and more evenly, giving you that silky coating without graininess.
- Dark chocolate (60 g, chopped): This is your drizzle star, adding contrast and preventing the whole bunny from looking one-note sweet.
- Mini marshmallows (24): Buy fresh ones if you can; stale marshmallows won't shape cooperatively, and they're what make this recipe actually cute.
- Edible pink food gel or pink candy melts: The gel is more forgiving if you're using a toothpick, but melts give you brighter color if you can temper your hand slightly.
- Candy eyes or mini chocolate chips (24): This is where personality happens—candy eyes are more expressive, but chocolate chips feel more natural if you're going for a rustic vibe.
Tired of Takeout? 🥡
Get 10 meals you can make faster than delivery arrives. Seriously.
One email. No spam. Unsubscribe anytime.
Instructions
- Prepare your stage:
- Line your baking sheet with parchment paper and wash those strawberries thoroughly, then pat them completely dry with paper towels—moisture is the enemy of good chocolate coating. Removing the stems makes them easier to dip, though I usually leave a tiny bit attached for grip.
- Melt the white chocolate gently:
- Whether you're using a double boiler or microwave (I do thirty-second bursts to avoid overheating), keep stirring until it's glossy and smooth. If it starts looking grainy, you've likely gotten water in it, and honestly, there's not much rescue from there.
- Dip with confidence:
- Hold each strawberry by the leafy end and dip it into the warm chocolate, twisting gently to coat all sides, then place it on your parchment to set. The key is moving quickly but not frantically—you want the coating to stick before it cools.
- Shape and attach those ears:
- While the chocolate is still slightly soft, cut your marshmallows in half and press two halves into the top of each bunny, angling them back slightly. If they're not holding, wait thirty seconds for the chocolate to firm up just a bit, then try again.
- Add personality with pink details:
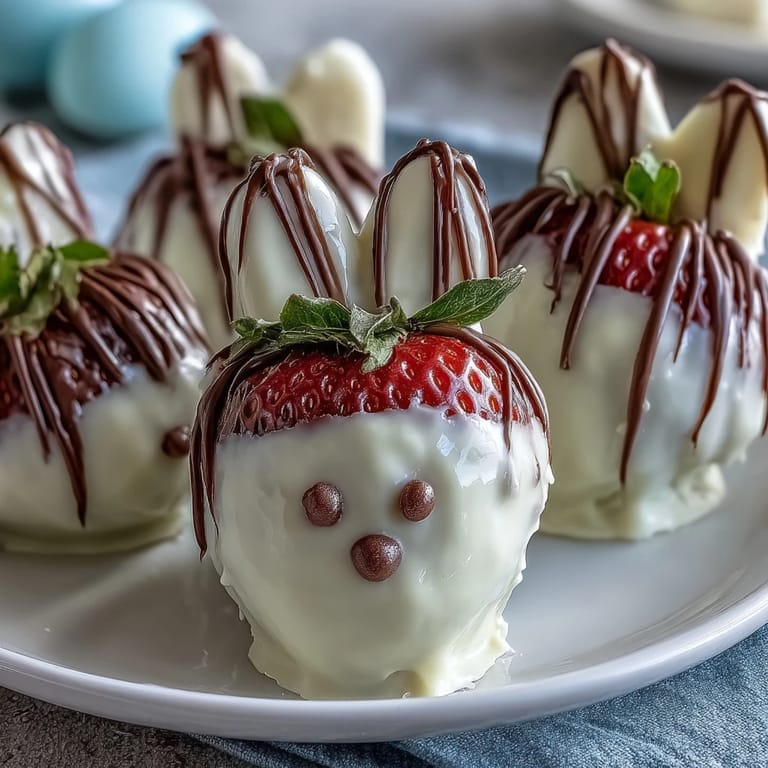
- Using a toothpick, dot the center of each marshmallow ear with pink gel or melted candy—this is the inner ear and instantly makes them look less like random marshmallows. Add a tiny dot on the strawberry point for a nose, and you'll see these little characters come alive.
- Place those eyes:
- Gently press candy eyes or chocolate chips where the eyes should go, right where the strawberry width is widest. They stick best if the white chocolate coating is still slightly tacky.
- Drizzle the dark chocolate finish:
- Melt your dark chocolate and either pipe it on with a small piping bag or use a fork to create whiskers and a mouth. A little whisker drizzle on the strawberry point looks remarkably charming and adds visual interest.
- Chill until set:
- Ten to fifteen minutes in the fridge lets everything firm up so your bunnies can be handled without bits falling off. They'll keep for a couple of days if you store them in a cool place, though they're best enjoyed fresh.
 Save to Pinterest
 The moment that sold me on these wasn't during construction; it was when my partner came home and found a bunny on the counter, and without any explanation, just smiled and shook his head in the way that means I've disappeared down a rabbit hole of cuteness. Sometimes food isn't about feeding people—it's about that small spark of joy that happens when someone sees something you made and gets it.
The Marshmallow Ear Secret
Not all marshmallows are created equal, and this matters here. The mini ones from the bulk section of your grocery store, bought fresh, will cooperate with you in ways that stale pantry marshmallows simply won't. I learned this the hard way when I grabbed a bag that had been sitting for six months; they were like little rubber erasers. Fresh marshmallows have a moisture content that makes them pliable, able to be pressed into the soft chocolate and hold their shape as everything sets together.
Making Them Your Own
The beauty of this recipe is how much room it gives you to play. One year I added a dot of gold luster dust to make fancy Easter bunnies; another time I used purple food gel and white chocolate chips to create a completely different character. Your friends and family will respond to the thoughtfulness of homemade far more than the perfection of execution, so don't stress if your marshmallow ears aren't symmetrical or your chocolate drizzle is slightly wobbly.
Storage and Timing Tips
These bunnies are actually more forgiving than you'd expect, which is a gift when you're planning an Easter gathering. You can make them the night before and store them in an airtight container in the refrigerator; the strawberry stays fresh, and the chocolate stays snappy. Bring them out thirty minutes before serving so they're not ice-cold, and they'll taste like you've just finished decorating them.
- Make the bunnies a day ahead if your Easter morning is chaotic, giving yourself breathing room on the actual holiday.
- If a marshmallow ear falls off during storage, you can simply glue it back on with a tiny dot of melted white chocolate.
- These are best served chilled but not frozen, so resist the urge to pop them in the freezer unless absolutely necessary.
 Save to Pinterest
 These little strawberry bunnies have become my Easter signature, the thing people ask me to bring year after year. They're proof that the simplest recipes, made with a little intentionality and a willingness to have fun, become the ones everyone remembers.
Common Recipe Questions
- → How do I prevent the strawberries from getting soggy?
Ensure strawberries are thoroughly washed and completely dried before dipping to keep the coating crisp and prevent sogginess.
- → Can I use other types of chocolate for coating?
Yes, you can substitute white chocolate with dairy-free or different flavored coatings to suit dietary preferences or taste.
- → What is the best way to attach marshmallow ears?
Cut mini marshmallows in half and gently press them onto the soft chocolate coating before it sets for proper adhesion.
- → How do I make the chocolate drizzle neat?
Use a small piping bag or a fork to drizzle melted dark chocolate in thin lines for precise decorative detail.
- → Can these treats be prepared in advance?
Yes, prepare and refrigerate them up to a day before serving to allow the chocolate to set fully and flavors to meld.
- → Are there alternatives for candy eyes?
Mini chocolate chips can replace candy eyes for a natural look and easy application.