 Save to Pinterest
 My cousin texted me one sweltering afternoon asking if I had anything cold and sweet in my kitchen—she'd just finished a brutal workout and was standing in front of my fridge looking defeated. I had three overripe bananas on the counter that were past their prime for eating whole, so I tossed them in the freezer the night before and made this the next morning. One taste and she stopped mid-sentence, eyes widening like I'd just handed her something from a fancy gelato shop. That moment stuck with me because it proved you don't need fancy equipment or a list of unpronounceable ingredients to create real magic.
I brought a batch to a book club once, nervous it wouldn't impress anyone since it's so simple. Someone asked if I'd bought it from a trendy smoothie bar, and when I said I'd made it at home with just bananas and cocoa powder, the whole room went quiet—then everyone wanted the recipe. There's something deeply satisfying about serving something that looks restaurant-quality but came from your own blender.
Ingredients
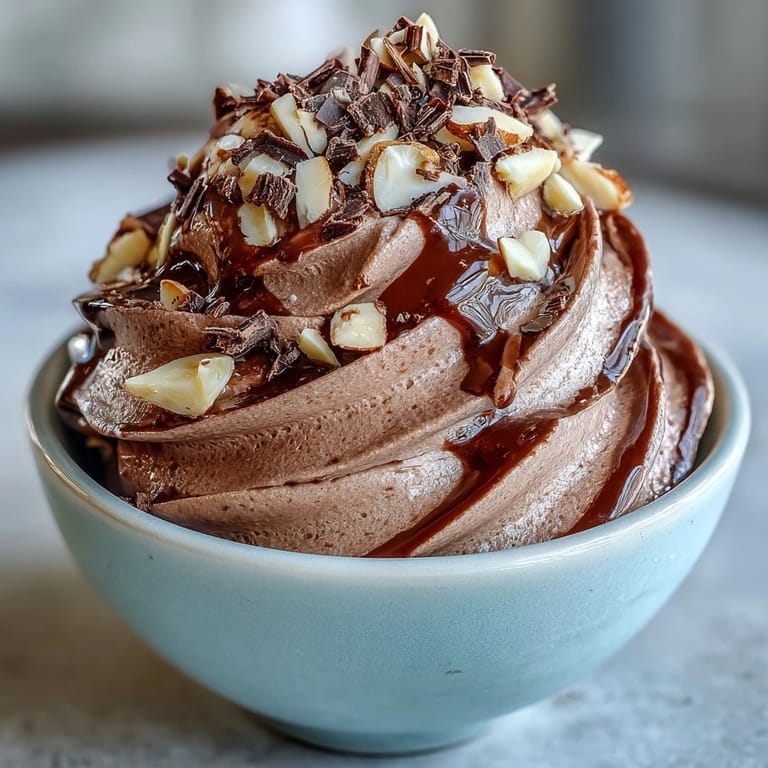
- Frozen banana slices (4 large, ripe): The foundation of everything—frozen bananas create that signature soft-serve texture that makes this feel like real ice cream without any dairy. Make sure they're truly ripe before freezing, with a few brown spots, because that's when the natural sweetness peaks.
- Unsweetened cocoa powder (3 tbsp): This is non-negotiable for that deep chocolate flavor, and going unsweetened means you control the sweetness level. Dutch-process cocoa gives a richer, darker result if you want to experiment.
- Maple syrup (2–3 tbsp): Maple adds a subtle warmth that regular sugar can't quite capture, though honey or agave work just fine as backups. Start with 2 tbsp and taste as you go—you can always add more but can't take it back.
- Almond butter (4 tbsp, plus extra for drizzling): This isn't just a topping; it adds creaminess and prevents the mixture from becoming icy. Natural almond butter works best, but make sure it's mixed well before measuring.
- Unsweetened almond milk (2–4 tbsp): Think of this as your emergency brake—use it sparingly to loosen up the texture if things get too thick. Cold milk works better than room temperature because it keeps everything frozen longer.
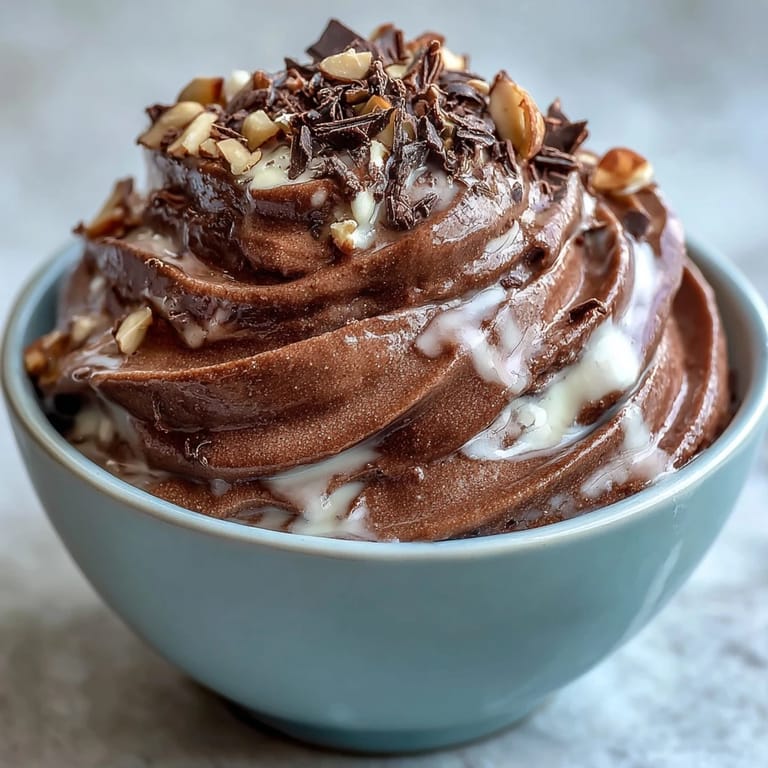
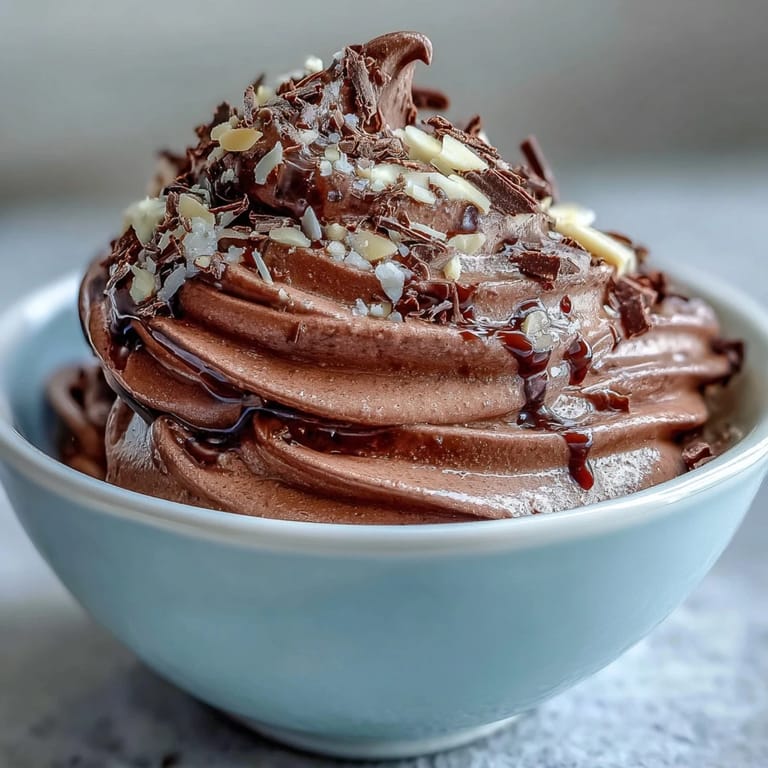
- Dark chocolate shavings (optional): Use a vegetable peeler on a bar of dark chocolate for elegant, paper-thin shards that melt on your tongue.
- Chopped toasted almonds (optional): Toasting them yourself brings out a nuttier flavor than raw, plus the crunch creates a nice contrast.
Tired of Takeout? 🥡
Get 10 meals you can make faster than delivery arrives. Seriously.
One email. No spam. Unsubscribe anytime.
Instructions
- Blend the frozen base:
- Pour those frozen banana slices into your blender and pulse a few times before fully blending—you'll hear the machine working harder at first, then it suddenly gives way as the bananas start breaking down. You're looking for a thick, slightly chunky texture at this point, not liquid.
- Add the flavor builders:
- Sprinkle in the cocoa powder, almond butter, and maple syrup, then blend on high until everything is completely combined and creamy. Pause halfway through to scrape down the sides with a spatula because cocoa powder loves to hide in corners.
- Adjust the consistency:
- If your mixture looks like thick dough, add almond milk one tablespoon at a time while blending, checking the texture after each addition. You want something that falls off a spoon in a soft wave, not pours like liquid.
- Taste and sweeten:
- Before scooping, take a small spoonful and let it sit on your tongue for a moment—cocoa powder can taste slightly bitter if you're not used to it, so adjust the maple syrup if needed. This is your last chance to dial in the flavor.
- Scoop and serve fresh:
- Transfer the nice cream to bowls immediately and drizzle with a little extra almond butter, letting it pool and swirl through the chocolate. Top with whatever you've chosen and eat it right away while it has that soft, pillowy texture.
- Optional freezing:
- If you want something firmer, transfer to a freezer-safe container and freeze for 1–2 hours, though it'll be harder to scoop and lose some of that silky mouthfeel. Check after an hour—timing depends on your freezer's temperature.
 Save to Pinterest
 There was a rainy Sunday when my nephew came to visit and we made this together, and I let him press the blender button. Watching his face light up when he realized frozen banana turns into ice cream was worth more than any perfect dessert. He still asks me to make it whenever he calls.
The Freezing Question
You have options here, and both are valid depending on what you're craving. If you serve it immediately, you get that soft-serve experience—almost like a thick milkshake you can eat with a spoon, which is my preference on hot days. If you freeze it for an hour or two, it becomes scoopable like traditional ice cream, though it'll never get as hard as the real thing because there's no stabilizers involved.
Flavor Combinations Worth Trying
This base is so flexible that you can completely transform it depending on your mood. I've made versions with peanut butter and a pinch of sea salt, ones with vanilla extract and cinnamon, even a wild batch where I added espresso powder for something my friends called dangerously addictive. The chocolate-almond combination is the classic for a reason, but once you understand how the ingredients work together, you'll start inventing your own combinations.
Storage and Longevity
Here's what I've learned through trial and error: nice cream is a now-or-soon situation, not a make-ahead dessert. The texture starts changing the moment it's made because it's essentially a thawing process that, once paused by cold, never quite returns to its original silky state. It'll still taste good after sitting in the freezer for a week, but that magical soft-serve quality disappears, leaving you with something closer to frozen chocolate banana sludge—which some people don't mind, but it's not the point. If you do freeze leftovers, let them sit on the counter for five minutes before scooping, and don't expect miracles.
- Make only as much as you'll eat in one sitting if you want the perfect texture.
- Frozen bananas last about three months in the freezer before developing freezer burn, so use them while they're fresh.
- A container with a tight-fitting lid prevents ice crystals from forming if you do choose to store it longer than a day or two.
 Save to Pinterest
 This recipe taught me that sometimes the best desserts aren't about complicated techniques or rare ingredients—they're about understanding how a few simple things transform when you freeze them and blend them together. I hope it brings you the same quiet joy it's brought to my kitchen.
Common Recipe Questions
- → What makes nice cream different from traditional ice cream?
Nice cream uses frozen bananas as its base instead of dairy cream, creating a naturally sweet and creamy frozen dessert without added sugar or heavy cream. The bananas provide that characteristic smooth texture when blended thoroughly.
- → Can I prepare the bananas ahead of time?
Absolutely. Slice ripe bananas and freeze them in a single layer on a parchment-lined tray. Once frozen solid, transfer to a freezer bag. They'll keep for up to three months and are ready to blend whenever cravings strike.
- → How do I achieve the smoothest consistency?
Use a high-speed blender or food processor, and be patient. Blend for 1-2 minutes, stopping frequently to scrape down the sides. If the mixture seems stuck or too thick, add almond milk one tablespoon at a time until it turns silky and smooth.
- → Can I make this without almond butter?
Yes. Peanut butter, cashew butter, or sunflower seed butter all work beautifully as substitutes. Each brings its own flavor profile while maintaining that rich, creamy swirl that contrasts perfectly with the chocolate banana base.
- → Will leftovers keep well in the freezer?
Nice cream is best enjoyed immediately when it has that soft-serve texture. If frozen, it becomes quite firm. Let it thaw for 10-15 minutes on the counter before scooping, or blend again with a splash of almond milk to restore creaminess.
- → How ripe should the bananas be?
Use bananas with plenty of brown spots—they're sweeter and blend more smoothly than yellow bananas. The natural sweetness intensifies as bananas ripen, reducing the need for additional sweeteners like maple syrup.