 Save to Pinterest
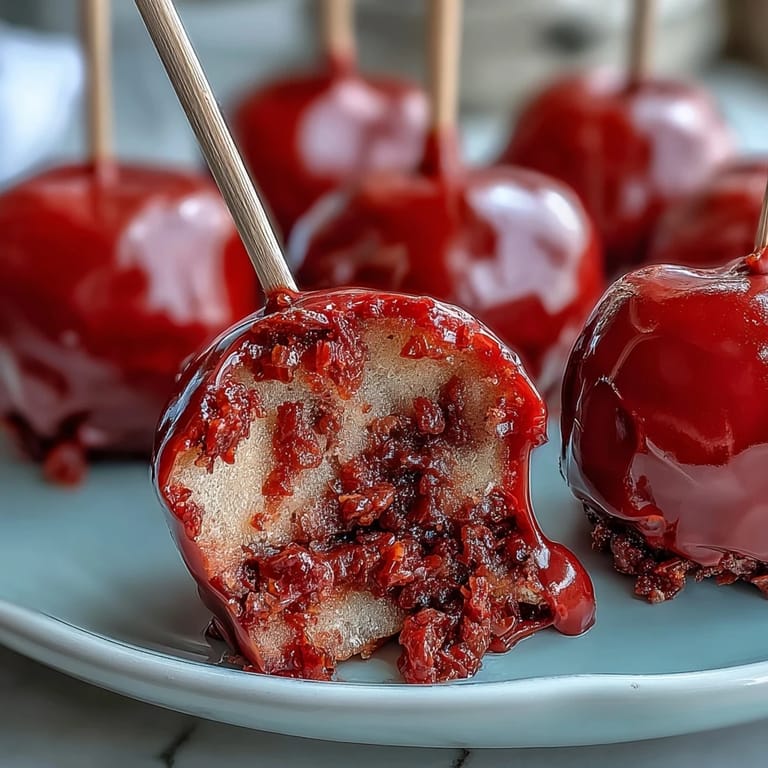
 My neighbor brought a plate of these to a block party last summer, and I watched them disappear faster than anything else on the dessert table. Something about biting into that crispy, shattering candy shell and hitting the tart apple beneath felt like a small celebration in your mouth. I spent the whole evening pestering her for the recipe, and now they're my go-to when I need something that looks fancy but feels effortless to make.
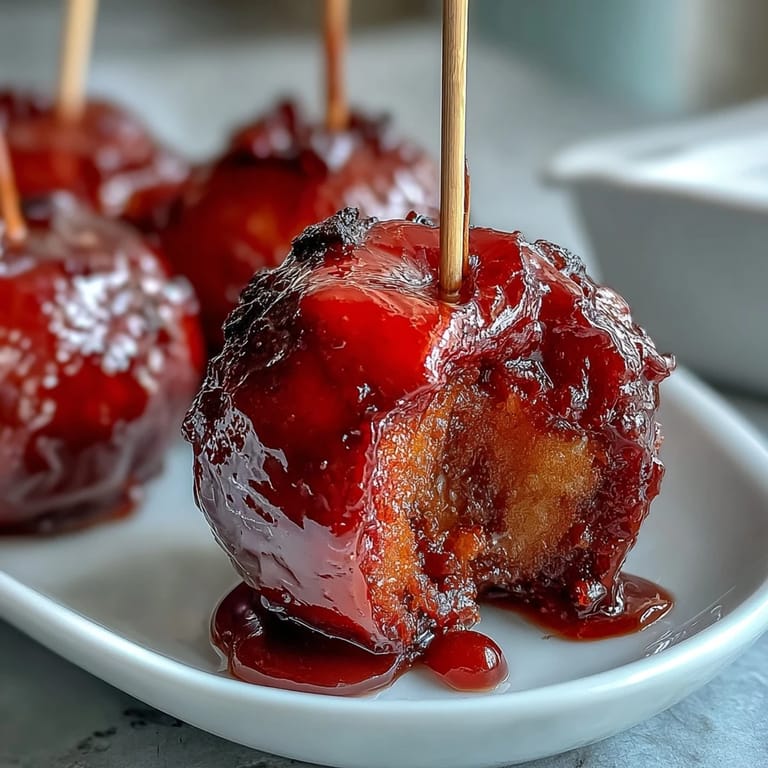
I made these for my daughter's Halloween party, and the kids were skeptical at first because they looked almost too shiny to eat. Then one brave kid tried one and suddenly every single child wanted to know what the crunchy red thing was. Watching them discover that apple hiding underneath the candy was worth every sticky finger and messy moment.
Ingredients
- 2 large crisp apples (Granny Smith or Fuji): The tartness cuts through the sweet candy coating beautifully, and firm apples won't fall apart when you dip them.
- 1 cup granulated sugar: This is your candy base, so use fresh granulated sugar rather than anything that's been sitting in your cabinet for ages.
- 1/3 cup light corn syrup: This keeps the candy from crystallizing and gives you that glossy, professional-looking finish.
- 1/4 cup water: Just enough to help everything dissolve and cook evenly.
- 1/4 teaspoon red food coloring: Add this after the candy reaches temperature so the heat doesn't dull the color.
- Nonstick cooking spray: A light spray on parchment paper prevents sticking without affecting taste.
- Optional toppings: Nuts, chocolate chips, or sprinkles applied immediately while the coating is still wet will stick beautifully.
Tired of Takeout? 🥡
Get 10 meals you can make faster than delivery arrives. Seriously.
One email. No spam. Unsubscribe anytime.
Instructions
- Prep your station:
- Line a tray with parchment paper and give it a quick spritz of nonstick spray. This is your landing pad, so set it somewhere you can reach easily when things get hot and fast.
- Cut and dry the apples:
- Core your apples and cut them into roughly 1-inch chunks. Pat them completely dry with paper towels, since any moisture will make the candy slip right off.
- Skewer each piece:
- Push a toothpick into each apple chunk, holding it by the pick like a tiny lollipop. Set your lineup aside and take a breath, because the next steps move quickly.
- Combine and cook the candy:
- Pour sugar, corn syrup, and water into a saucepan and stir just until combined. Turn heat to medium-high and let it bubble away without stirring, watching the mixture shift from cloudy to clear and then to a deep amber.
- Monitor the temperature:
- Clip your candy thermometer to the pan and wait for it to hit 300°F, the hard crack stage where the candy will shatter when cooled. This usually takes 7 to 8 minutes, and when it gets there, remove the pan from heat immediately.
- Add the color:
- Stir in your red food coloring quickly but gently, being careful because the mixture will hiss slightly. You now have maybe 30 seconds of working time before this starts to harden, so be ready to dip.
- Dip with confidence:
- Working as fast as you can, dip each apple chunk into the candy, swirling it around to coat completely. Let the excess drip off for just a second, then place it on your prepared tray.
- Dress it up (optional):
- If you're using toppings, sprinkle them on immediately while the coating is still tacky. Once it hardens, nothing sticks.
- Cool and set:
- Let everything sit at room temperature until completely hard and glossy. Resist the urge to move them or refrigerate them, because patience here means a perfect candy shell.
 Save to Pinterest
 I once brought these to a potluck where someone's grandmother asked for the recipe, and when I explained how simple they were, she looked almost disappointed. But then she took one bite and admitted that sometimes the best things in life don't require fussing. That moment stuck with me.
The Science Behind That Shatter
Hard crack candy is all about temperature, and there's actually no guesswork involved once you understand what's happening. When sugar reaches 300°F, all the water has cooked off and the molecules lock into a glass-like structure. That's why your apples get that satisfying crunch, and it's also why timing and a reliable thermometer matter so much.
Making Them Ahead of Time
These actually keep beautifully in an airtight container at room temperature for up to three days, which is a lifesaver when you're entertaining. I've learned to make them the night before and just arrange them on a platter right before guests arrive, giving myself one less thing to panic about. The candy stays glossy and crisp as long as you keep them away from humidity.
Creative Variations Worth Trying
Once you master the basic red candy coating, you can play with nearly endless combinations. I've made versions with green food coloring for Halloween, gold food coloring for fancy occasions, and even skipped the color entirely for an elegant clear coating. You could also swap in different toppings based on your mood, from crushed pretzels for salt and sweet to edible glitter for pure drama.
- Try green food coloring and top with mini dark chocolate chips for a sophisticated look.
- Make a double batch so you have extras, because they vanish even faster than you'd expect.
- If you're nervous about the candy stage, practice with a small batch first to get the feel for working speed.
 Save to Pinterest
 These little bites have become my secret weapon for making any gathering feel a bit more special. There's something about the combination of effort and simplicity that people genuinely appreciate.
Common Recipe Questions
- → What type of apples work best for these bites?
Crisp varieties like Granny Smith or Fuji hold up well and provide a refreshing tartness balanced by the candy coating.
- → How do I prevent the candy coating from sticking to the tray?
Line your tray with parchment paper and lightly spray with nonstick cooking spray before placing the coated apples to cool.
- → Can I add toppings to these candy apples?
Yes, immediately after dipping, sprinkle chopped nuts, mini chocolate chips, or sprinkles onto the candy coating before it hardens.
- → What is the significance of reaching the hard crack stage?
Heating the sugar syrup to 300°F ensures the coating hardens with a crisp, glossy finish that won't be sticky at room temperature.
- → How should the apples be prepared before dipping?
Core and cut apples into bite-sized chunks, then pat them dry thoroughly to help the candy adhere evenly.