 Save to Pinterest
 My daughter came home from school one afternoon absolutely enchanted by a story her teacher told about hidden treasures and secret caves. That night, I found myself in the kitchen thinking about how to turn her imagination into something edible, and that's when the idea hit me—what if we built an actual cave she could explore with her fork? The Crystal Cave was born from that simple desire to make magic taste as good as it looks.
The first time I made this for a dinner party, I was so nervous about the crackers collapsing that I used way too much melted butter. They ended up sliding everywhere like a chocolate avalanche, and I found myself laughing so hard I could barely stand. My friend grabbed a handful of the scattered crackers, dunked them into the grape pile, and declared it even better as a casual snack pile. That's when I realized this dessert doesn't need to be precious—it just needs to be joyful.
Ingredients
- Seedless green grapes: Make sure they're completely dry before rolling in sugar, or everything will clump instead of sparkle like it should.
- Sparkling sugar or coarse sanding sugar: This is what gives you that audible crunch and that shimmer that catches the light just right.
- Rock candy: Hunt for assorted colors if you can find them; the visual pop inside the cave is half the magic.
- Dark chocolate wafer crackers: These are sturdier than they look and taste sophisticated without being fussy.
- Unsalted butter: Just enough to act as edible glue between the crackers—you're building, not drowning them.
Tired of Takeout? 🥡
Get 10 meals you can make faster than delivery arrives. Seriously.
One email. No spam. Unsubscribe anytime.
Instructions
- Roll the grapes into sparkling sugar:
- Pat your grapes dry with a paper towel first—this is the secret step everyone skips and then wonders why their sugar slides right off. Toss them in a shallow bowl of sparkling sugar and watch them catch the light like tiny jewels.
- Toast them with rock candy pieces:
- Gently fold the crushed rock candy into your sugared grapes so the pieces stick and create extra glitter in every bite. Some will cluster, some will scatter, and both are exactly right.
- Build your cave structure:
- On your serving platter, stand the chocolate crackers upright in a loose circle, overlapping them slightly so they lean on each other. Leave a gap at the front like an open mouth—this is your cave entrance.
- Use butter as your mortar:
- With a small brush or the tip of a knife, dab melted butter where crackers meet so they hold their cave shape without sliding. Think of it like you're gently persuading them to stay put, not forcing them.
- Pour in the treasure:
- Pile your sugared grapes and rock candy into the center of the cave, letting some tumble out and scatter across the platter dramatically. This is where the magic lives.
- Serve right away:
- The crackers stay crunchiest within the first hour, but you can refrigerate the whole thing for up to 60 minutes if you're prepping ahead.
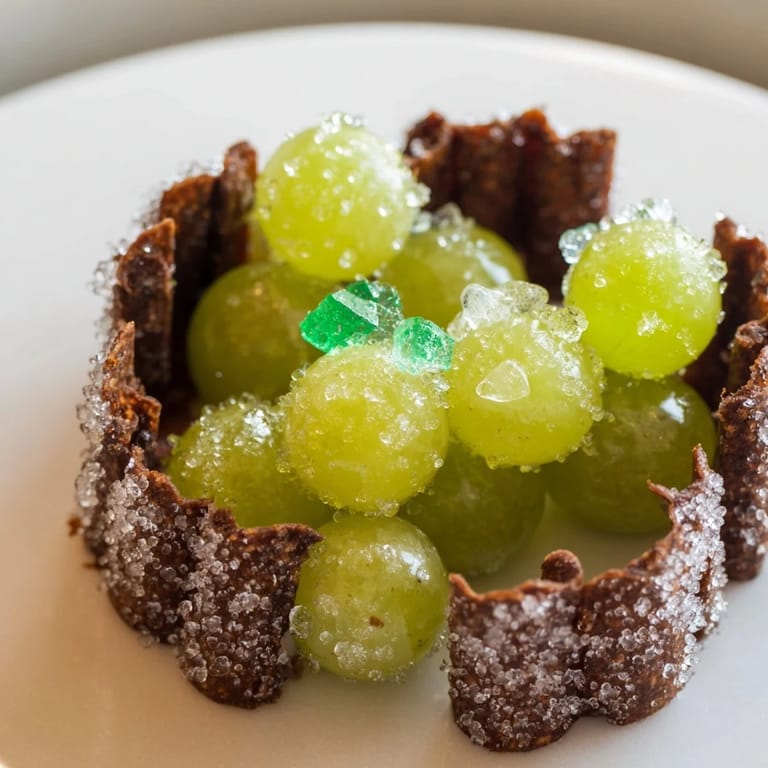
 Save to Pinterest
 There's something about watching someone's face when they realize the cave is actually edible—that moment when they reach in with their fork and the whole thing becomes interactive, tactile, fun. It stopped being just a dessert and became an experience, a story they'd tell someone else later.
Making It Truly Sparkle
If you want to push the visual drama even further, brush a tiny bit of edible glitter mixed with a drop of water onto some of the crackers before assembly. The shimmer catches the light from different angles, and it transforms the whole presentation into something that feels genuinely magical rather than just playful.
When You Want Extra Flavor Layers
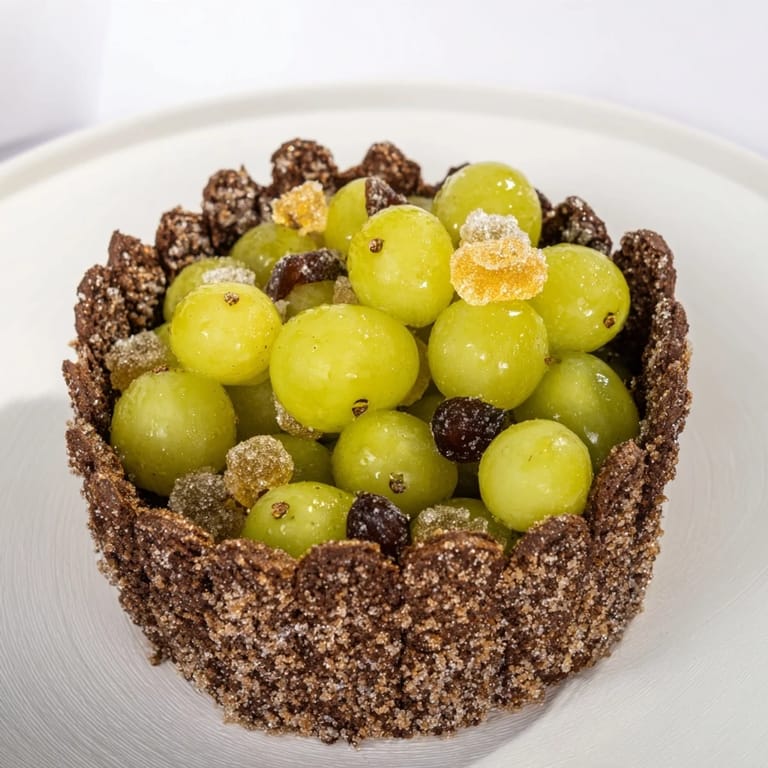
A few scattered blueberries tucked into the grape pile add color contrast and a slight tartness that plays beautifully against the sweetness of the sugar and candy. They also fill in gaps and make the treasure pile look fuller and more abundant. If you're feeling adventurous, a light dusting of freeze-dried raspberry powder on top adds both color and an interesting subtle tang.
Serving and Storage Wisdom
This dessert is genuinely best served immediately when everything is at peak crunch. The crackers will soften slightly as the grapes release their moisture, but that happens slowly enough that you have a solid hour to work with.
- Set up the cave no more than 30 minutes before serving if you want maximum crunch in every bite.
- Offer small forks so people can actually navigate the inside of the cave without the whole structure tumbling.
- A small bowl of whipped cream or vanilla yogurt on the side gives guests a dipping option and adds creaminess to balance all that sweetness.
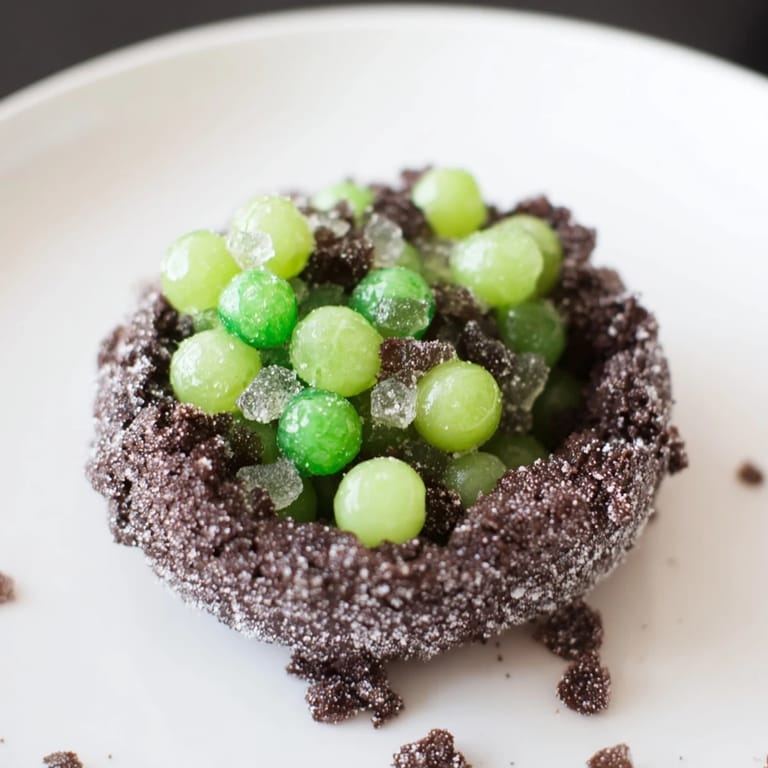 Save to Pinterest
 This dessert lives in that perfect space where it's simple enough for an ordinary Tuesday night but magical enough to make someone remember it. That's the whole point.
Common Recipe Questions
- → What type of grapes works best?
Seedless green grapes are ideal as they are easy to coat and provide a juicy, fresh taste.
- → Can I substitute the dark chocolate wafers?
Yes, chocolate cookies or graham crackers can be used as alternatives for the cave structure.
- → How do I assemble the cave?
Arrange the crackers upright in a circle and use melted butter between them to help them stick and stand.
- → Should the grapes be dry before coating?
Yes, thoroughly drying the grapes helps the sparkling sugar and rock candy adhere better.
- → Can this dessert be prepared in advance?
It’s best served immediately for optimal crunch, but it can be refrigerated up to 1 hour if needed.
- → Are there any recommended additions?
Adding edible glitter enhances shine, and blueberries provide a nice color contrast if desired.