 Save to Pinterest
 I stumbled onto sweet potato toast during a week when my toaster broke and I was too stubborn to buy bread. I sliced a sweet potato lengthwise, brushed it with oil, and roasted it until the edges crisped up. What started as a lazy workaround turned into something I now make on purpose. The natural sweetness of the potato plays so well with both savory and sweet toppings that I stopped seeing it as a substitute and started treating it like its own thing.
The first time I made these for friends, I set out bowls of toppings and let everyone build their own. One person went full dessert with peanut butter and banana, another piled on hummus and feta, and someone else made a breakfast version with eggs and chives. Watching people get excited about customizing their own toast felt like hosting a tiny breakfast bar in my kitchen. It became my go-to for brunch gatherings because it requires almost no effort but feels interactive and fun.
Ingredients
- Sweet Potatoes: Choose firm, evenly shaped ones so your slices come out uniform and roast at the same rate.
- Olive Oil: Brushing both sides helps the edges crisp up beautifully and keeps the flesh from drying out in the oven.
- Salt: Just a pinch on the raw slices brings out the natural sweetness without making it taste savory.
- Avocado: Creamy and rich, it balances the sweetness and adds healthy fats that keep you full.
- Cottage Cheese: High in protein and tangy, it works on both sweet and savory versions surprisingly well.
- Cherry Tomatoes: Their burst of acidity cuts through richer toppings and adds color.
- Peanut Butter: Go for the natural kind without added sugar so you control the sweetness level.
- Banana: Slice it thin so it sits flat and does not slide off when you pick up the toast.
- Granola: Adds crunch and a bit of sweetness, plus it sticks well to peanut butter or honey.
- Honey: Drizzle it last so it does not burn in the oven and keeps its floral notes.
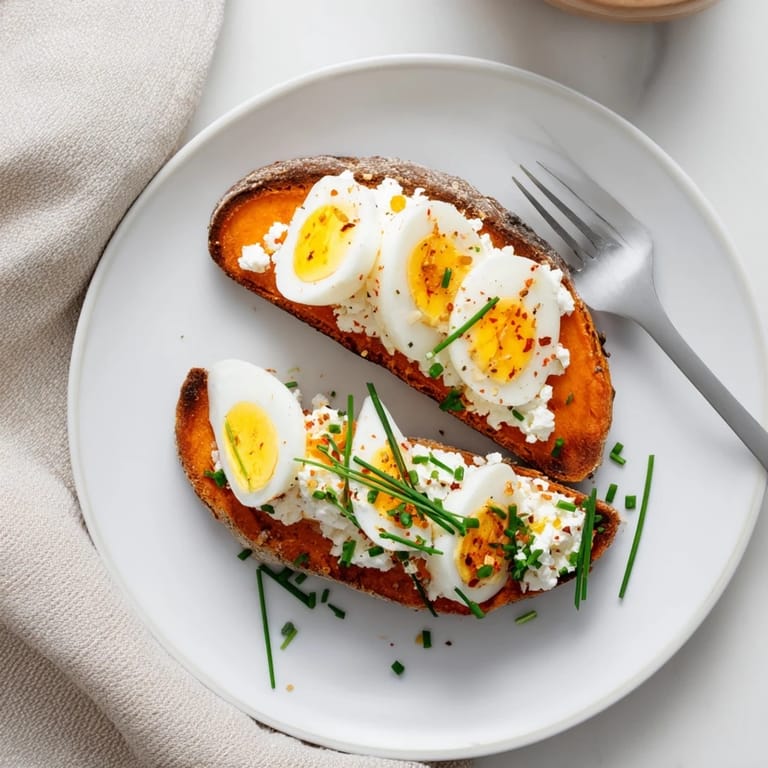
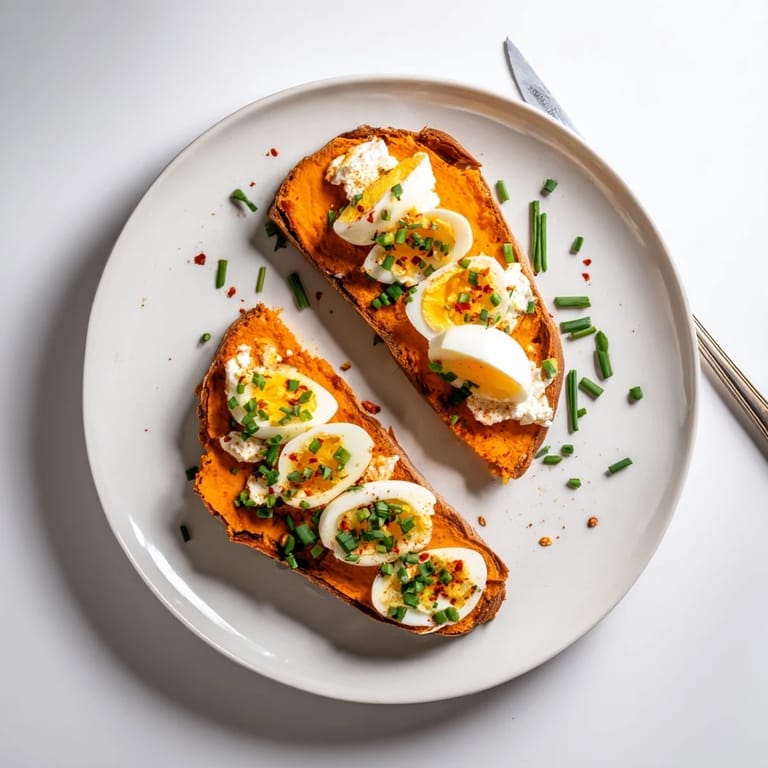
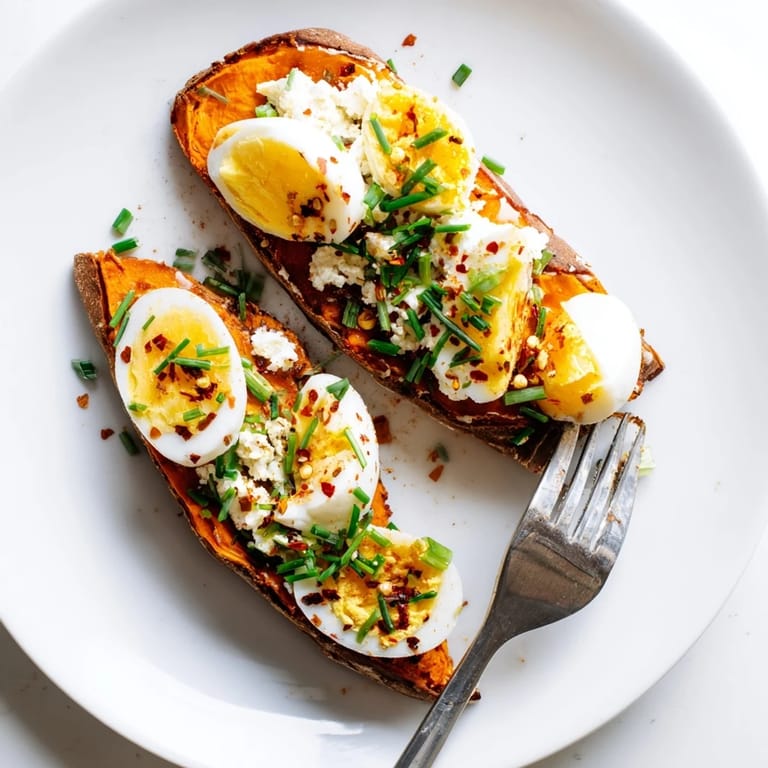
- Hard Boiled Eggs: Slice them while they are still slightly warm for cleaner cuts and better flavor.
- Chives: Freshly chopped chives add a mild onion flavor without overpowering the delicate sweet potato.
- Hummus: Any variety works, but roasted red pepper or garlic hummus adds extra depth.
- Feta Cheese: Crumbled feta brings salty, tangy contrast that makes savory versions sing.
- Chili Flakes: A small pinch adds warmth and a little heat without making it spicy.
- Fresh Herbs: Parsley, cilantro, or basil brighten up any topping combo and make it look restaurant ready.
Tired of Takeout? 🥡
Get 10 meals you can make faster than delivery arrives. Seriously.
One email. No spam. Unsubscribe anytime.
Instructions
- Preheat Your Oven:
- Set it to 400°F (200°C) and let it fully heat while you prep the sweet potatoes. A hot oven ensures even roasting and crispy edges.
- Slice the Sweet Potatoes:
- Cut them lengthwise into slices about 1/4 inch thick, aiming for uniform thickness so they cook evenly. If one end is thicker, save those slices for a snack or dice them for another meal.
- Brush with Oil and Season:
- Use a pastry brush or your fingers to coat both sides with olive oil, then sprinkle lightly with salt. This step makes all the difference between pale, dry slices and golden, flavorful ones.
- Arrange on a Baking Sheet:
- Lay them in a single layer on parchment paper, making sure they do not overlap. Crowding the pan traps steam and prevents crisping.
- Roast Until Tender:
- Bake for 20 to 25 minutes, flipping halfway through so both sides get that caramelized color. They should be fork tender but not falling apart.
- Cool Slightly:
- Let them rest on the baking sheet for a minute or two so they firm up just enough to handle. They will be easier to top and less likely to tear.
- Add Your Toppings:
- Go savory with avocado and tomatoes, or sweet with peanut butter and banana. Layer them thoughtfully so each bite has a little bit of everything.
- Serve Warm:
- Enjoy them right away while the sweet potato is still warm and the toppings are fresh. Cold sweet potato toast loses some of its magic.
 Save to Pinterest
 One morning I made a batch for myself and topped half with cottage cheese and honey, the other half with avocado and chili flakes. Eating them side by side, I realized how versatile this little trick was. It felt less like following a recipe and more like having a new kitchen tool I could use any time I wanted something quick, filling, and a little bit special.
Choosing the Right Sweet Potato
Look for sweet potatoes that are straight and evenly shaped, not tapered or lumpy, so your slices come out the same size. The skin should be firm and smooth without soft spots or sprouts. I have learned that medium sized ones work better than giant ones because the slices fit neatly on a baking sheet and roast more evenly. Orange fleshed varieties are sweeter and creamier, while white or purple ones have a drier, starchier texture that some people prefer for savory toppings.
Topping Combinations That Work
Savory combinations like hummus, crumbled feta, and a sprinkle of chili flakes give you a Mediterranean vibe that pairs well with a simple salad. For breakfast, try mashed avocado with sliced hard boiled eggs and chives for something filling and protein packed. On the sweet side, peanut butter with banana and granola feels like dessert but keeps you full for hours. I have also done cottage cheese with honey and fresh berries when I want something light but satisfying.
Storage and Make Ahead Tips
Roasted sweet potato slices keep in the fridge for up to four days in an airtight container, and you can reheat them in a toaster or oven to bring back some crispness. I like to roast a big batch on Sunday and keep them plain so I can top them differently throughout the week. Do not add toppings until you are ready to eat, or they will get soggy and lose their appeal. If you are meal prepping, store toppings separately in small containers and assemble them fresh each time.
- Reheat in a toaster or oven at 350°F for five minutes to restore the crispy edges.
- Freeze roasted slices between layers of parchment paper for up to two months.
- Thaw frozen slices in the fridge overnight and toast before serving for best texture.
 Save to Pinterest
 Sweet potato toast has become one of those things I make without thinking, a reliable base that adapts to whatever mood or craving I am in. It is proof that the best recipes are not always the most complicated ones, just the ones that fit easily into your life and taste good every single time.
Common Recipe Questions
- → How thick should I slice the sweet potatoes?
Slice sweet potatoes lengthwise into 1/4-inch (0.6 cm) thick slices. This thickness allows them to become tender inside while developing lightly browned edges during roasting.
- → Can I make these ahead of time?
Yes, you can roast the sweet potato slices ahead and store them in an airtight container in the refrigerator for up to 3 days. Reheat in the oven or toaster before adding toppings to restore crispness.
- → What are some vegan topping options?
Try plant-based spreads like almond butter or tahini, avocado, hummus, roasted vegetables, fresh herbs, cherry tomatoes, or vegan cheese. You can also use coconut yogurt with granola and fresh fruit for a sweet variation.
- → How do I get extra crispy sweet potato slices?
After roasting, place the slices in a toaster or toaster oven for a few minutes to achieve extra crispness. Be careful not to burn them. This step works especially well if you've made them ahead.
- → Are these gluten-free?
Yes, sweet potato toast is naturally gluten-free. However, check labels on processed toppings like granola, peanut butter, and store-bought hummus, as some may contain gluten or be processed in facilities with gluten.
- → What's the best way to season the potatoes before roasting?
Brush both sides with olive oil and sprinkle lightly with salt. This simple seasoning lets the natural sweetness of the potato shine while creating a golden, slightly crispy exterior during roasting.