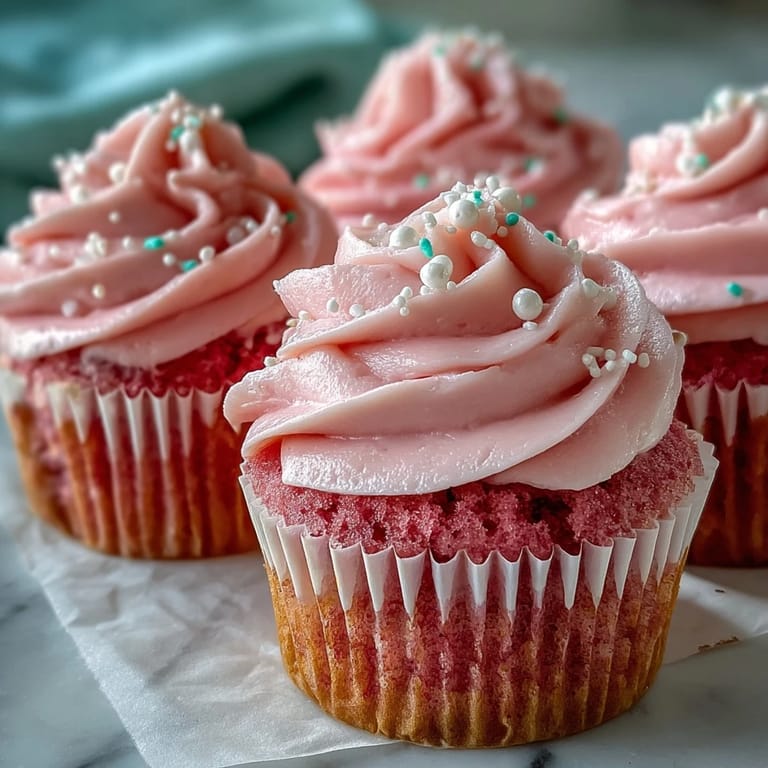
 Save to Pinterest
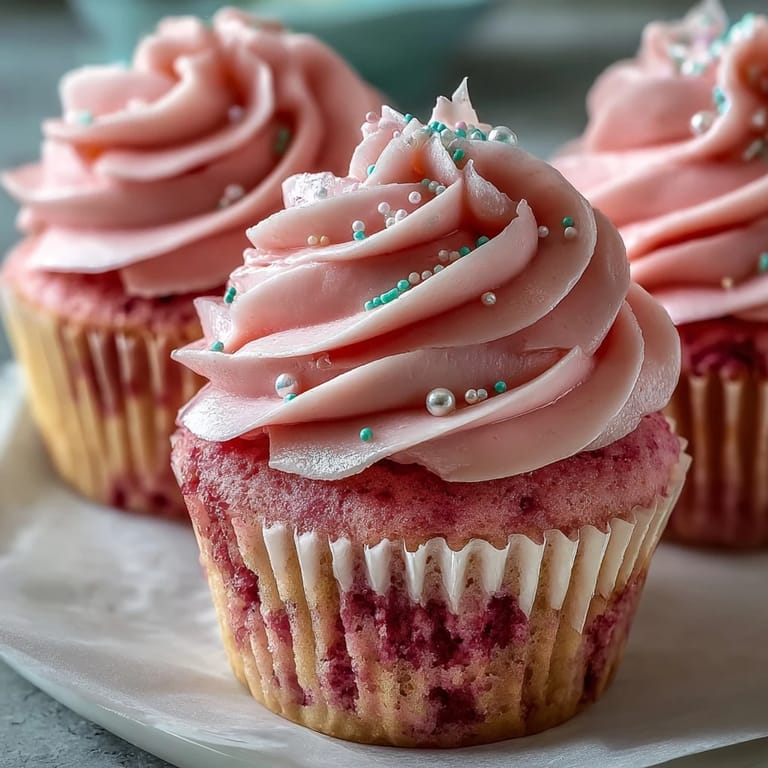
 I stumbled upon this pink velvet cupcake recipe during a particularly dreary February afternoon when the winter seemed endless. The kitchen transformed into my personal sanctuary as I whisked together that first batch, watching with childlike wonder as the batter turned the most delicate shade of pink. The tangy buttermilk balanced the sweetness perfectly, and the aroma that filled my apartment was nothing short of magical. That afternoon, as snow fell quietly outside my window, these blush-colored treats became my little rebellion against winter's grayscale palette.
Last spring, I brought these cupcakes to my cousins baby shower where everyone was expecting the traditional pink-for-a-girl theme. When I unveiled the tower of these velvet beauties with their swirled frosting peaks, my usually stoic aunt actually gasped. The mom-to-be, fighting pregnancy food aversions for months, ate three in succession, declaring they were the first dessert shed truly enjoyed in her entire third trimester. Standing in that sunlit room, watching faces light up with each bite, I realized food can be both celebration and comfort simultaneously.
Ingredients
- Cake flour: This lighter flour creates that distinctive velvet texture, but if youre in a pinch, the all-purpose flour with cornstarch substitution works surprisingly well after I discovered this trick during a late-night baking emergency.
- Buttermilk: The secret weapon that makes these cupcakes exceptionally tender while adding that subtle tang that elevates them beyond ordinary vanilla cupcakes.
- White vinegar: Dont skip this seemingly odd ingredient, as it not only helps the pink color pop but also reacts with the baking soda to create the fluffiest texture imaginable.
- Pink gel food coloring: Gel works far better than liquid, requiring just a tiny amount for that signature blush color without affecting the batters consistency.
- Heavy cream: This transforms ordinary buttercream into a silky dream that pipes beautifully and melts on your tongue rather than feeling grainy or overly sweet.
Tired of Takeout? 🥡
Get 10 meals you can make faster than delivery arrives. Seriously.
One email. No spam. Unsubscribe anytime.
Instructions
- Prepare your workspace:
- Preheat your oven to 350°F and line your muffin tin with those pretty paper liners. Having everything measured and ready before you start mixing makes the entire process feel like a choreographed dance rather than a kitchen scramble.
- Create the cloud-like base:
- When beating the butter and sugar together, dont rush this step. Watch as the mixture transforms from yellow and grainy to almost white and incredibly fluffy, creating the foundation for that perfect texture.
- Master the mixing method:
- The alternating dry-wet-dry addition isnt just baking snobbery, I promise. This method prevents gluten from developing too much, keeping your cupcakes tender instead of tough.
- Add the magic pink potion:
- When you swirl in that vinegar-food coloring mixture, youll see the batter transform before your eyes. The subtle color shift feels like witnessing a bit of kitchen alchemy at work.
- Mind the fill line:
- Resist the urge to overfill those liners. Two-thirds full might not look like much, but these cupcakes rise beautifully, and the perfect dome forms when theres room to grow.
- The cooling period:
- Those five minutes in the pan followed by wire rack cooling arent optional. This gentle transition prevents the delicate cupcakes from collapsing or becoming gummy in the center.
- Whip up cloud-like frosting:
- The gradual addition of powdered sugar prevents those annoying sugar dust explosions. Watch for the texture to transform from yellow and heavy to almost white and impossibly light.
- The finishing touch:
- Whether you pipe elaborate swirls or simply spread with an offset spatula, that final crown of buttercream is what transforms these from muffins to proper cupcakes. The contrast between tender cake and silky frosting creates that perfect bite.
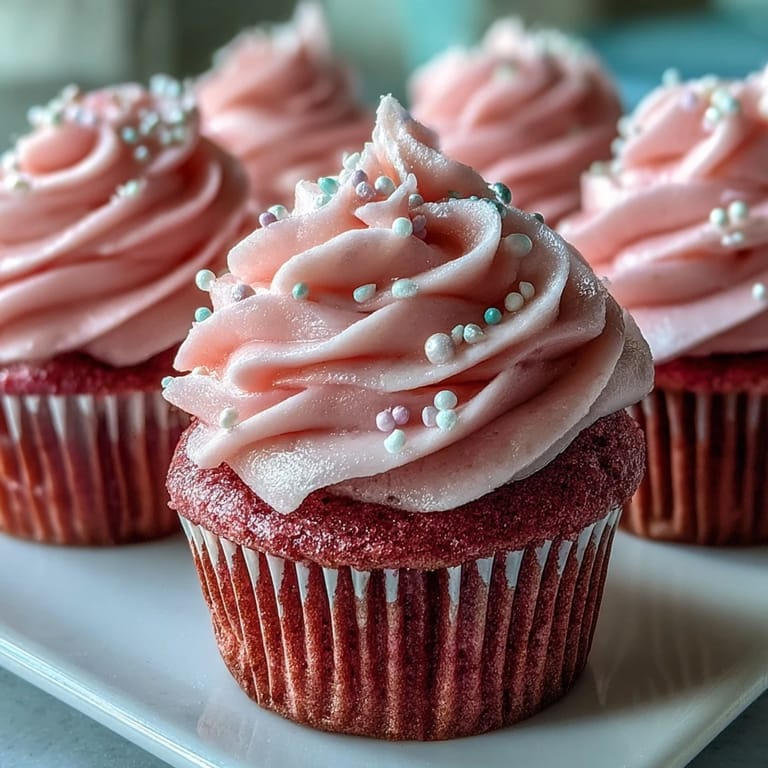
 Save to Pinterest
 On my friends thirtieth birthday, I arrived at her apartment with these cupcakes precariously balanced in a container. I had spent the morning perfecting each frosting swirl, anxious about the presentation. When she opened the box, tears welled in her eyes, not from their appearance but because pink velvet cake had been her grandmothers specialty, something I hadnt known. As we sat together, eating cupcakes for breakfast and sharing stories, I was reminded that sometimes the most meaningful connections happen when we least expect them, crumbs on our laps and frosting on our fingers.
The Perfect Pink
Finding the right shade of pink took me several attempts, with my first batch turning out almost neon. The trick is adding the tiniest amount of gel coloring first, then gradually building up, remembering that the color intensifies slightly during baking. For those seeking a natural alternative, about two tablespoons of beet powder creates a gorgeous rosy hue without affecting the flavor, though it does make the batter slightly denser so a touch more buttermilk helps maintain the texture.
Make-Ahead Options
Life gets busy, which is why I now regularly prepare components of these cupcakes in advance. The unfrosted cupcakes freeze beautifully for up to two months when wrapped individually in plastic then stored in a freezer bag. The buttercream can be refrigerated for a week, though youll need to bring it to room temperature and re-whip it before using. Even the fully assembled cupcakes can be frozen, though the texture of the frosting changes slightly, becoming more dense but still delicious.
Creative Variations
These pink velvet beauties serve as a perfect canvas for seasonal adaptations throughout the year. During summer months, I fold fresh raspberry puree into the frosting for a burst of fruit flavor that complements the tangy cake base. Winter holidays call for a drop of peppermint extract in both cake and frosting, paired with crushed candy cane sprinkles that create a festive pink-and-white palette.
- For bridal showers, try adding a tablespoon of rosewater to the batter for a subtle floral note that feels elegant and unexpected.
- Kids birthdays call for confetti versions, where rainbow sprinkles folded into the batter create delightful bursts of color in each bite.
- When serving adults, consider spiking the frosting with a tablespoon of pink champagne reduced to a syrup for sophisticated celebration cupcakes.
 Save to Pinterest
 These pink velvet cupcakes have become my signature offering, requested at gatherings and quietly anticipated by friends who know my baking habits. In their delicate color and balanced flavors, they somehow manage to feel both special and comforting at once.
Common Recipe Questions
- → What makes these cupcakes pink?
The blush-pink color comes from pink gel food coloring stirred into the batter. For a natural alternative, beet powder creates a lovely rosy hue without artificial dyes.
- → Can I make these cupcakes ahead of time?
Yes! Bake the cupcakes up to one day in advance and store unfrosted in an airtight container. Frost within 24 hours of serving for the freshest taste and texture.
- → What's the difference between red velvet and pink velvet?
Red velvet traditionally includes cocoa powder and buttermilk with a distinct chocolate undertone. Pink velvet skips the cocoa, focusing on pure vanilla flavor with a lighter, more delicate crumb.
- → How do I know when the cupcakes are done baking?
Insert a toothpick into the center—if it comes out clean or with just a few moist crumbs, they're ready. Overbaking leads to dry texture, so start checking at 18 minutes.
- → Can I use natural food coloring?
Absolutely! Beet powder works beautifully for natural pink color. Start with ½ teaspoon and adjust until you reach your desired shade. The flavor remains neutral.
- → Why is room-temperature butter important?
Room-temperature butter incorporates air when creamed, creating lift and tenderness. Cold butter won't blend properly, leading to dense cupcakes with uneven texture.