 Save to Pinterest
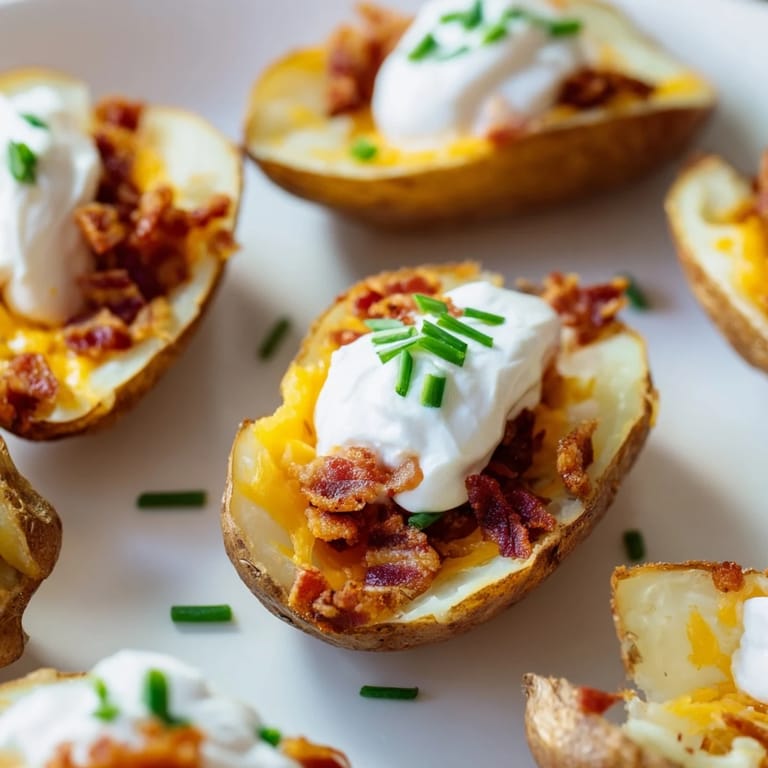
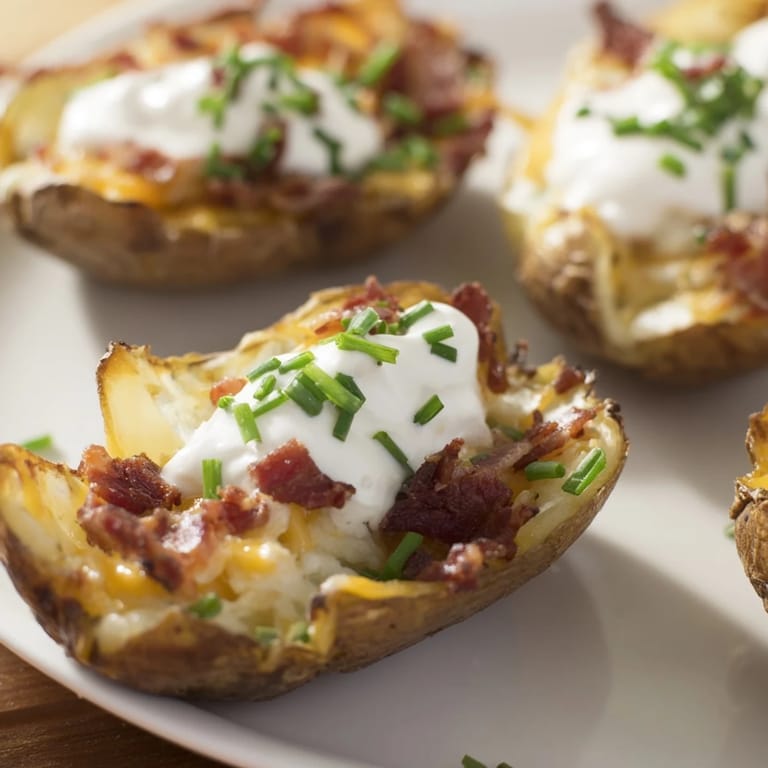
 My college roommate threw a Friday night gathering and showed up with a tray of these golden-brown potato skins, steam still rising off them. I was skeptical at first—they seemed almost too simple—but one bite of that crispy skin paired with melted cheddar and bacon changed my mind. It turned out she'd been making them for years at her family's cabin, perfecting the technique each summer. Now they're the first thing I make when friends are coming over, and honestly, they disappear faster than I can pull them from the oven.
I remember watching my partner's face light up the first time I made these for a holiday potluck. Someone else brought a fancy casserole, but these potato skins were gone before the main course even started. That's when I realized this recipe doesn't compete with fancy food—it just wins people over by being exactly what they didn't know they wanted.
Ingredients
- Large russet potatoes: You need sturdy ones that won't fall apart, so russets are non-negotiable here.
- Olive oil: This is your secret to getting those skins genuinely crispy rather than just baked.
- Kosher salt and freshly ground black pepper: Don't skip grinding the pepper fresh—pre-ground tastes flat by comparison.
- Shredded sharp cheddar cheese: The sharpness cuts through the richness and keeps it from feeling one-note.
- Cooked bacon: If you cook it yourself instead of using bits from a jar, you'll taste the difference immediately.
- Sour cream: The cool dollop at the end is what brings everything together and prevents it from being too heavy.
- Fresh chives: A small touch that looks intentional and adds brightness without overwhelming anything.
Tired of Takeout? 🥡
Get 10 meals you can make faster than delivery arrives. Seriously.
One email. No spam. Unsubscribe anytime.
Instructions
- Get your potatoes ready:
- Scrub them under running water so they're completely clean, then poke holes all over with a fork. The holes let steam escape so they cook evenly instead of turning into little bombs in your oven. Coat them generously with olive oil and season with salt and pepper.
- Bake until they yield:
- Pop them into a 400°F oven for 40 to 45 minutes—they should feel tender when you poke them with a fork. You're not looking for soft mashed potato texture; you just want them cooked through.
- Cool and halve:
- Let them rest for 10 minutes so you don't burn your fingers, then carefully cut each one in half lengthwise. The skins are delicate at this point, so take your time.
- Scoop with intention:
- Using a spoon, gently scoop out most of the insides, leaving a sturdy quarter-inch shell that holds everything together. Save that scooped flesh for mashed potatoes or breakfast scrambles—it's too good to waste.
- Crisp the shells:
- Turn the oven up to 450°F and place the hollow skins back on the baking sheet, skin side down. Brush the insides lightly with olive oil and bake for 10 minutes until they start to look golden and papery.
- Load them up:
- Pull them out, sprinkle each skin with cheddar and crumbled bacon, then return to the oven for 5 to 7 minutes until the cheese bubbles and slightly browns at the edges. The edges matter—that's where the flavor concentrates.
- Final flourish:
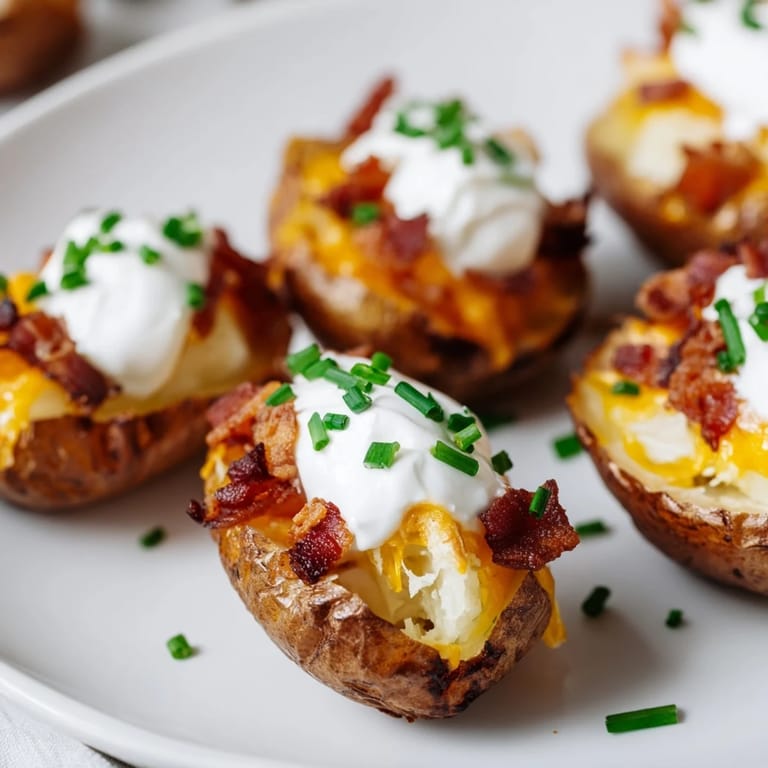
- Top each skin with a small dollop of sour cream and a sprinkle of chives right before serving. The cold cream against the hot potato is non-negotiable.
 Save to Pinterest
 There was a moment during a casual dinner party when someone asked for the recipe and I realized these skins had become the thing people actually remembered from the meal. It made me understand that food isn't always about being complicated or impressive—sometimes it's just about getting the fundamentals right and letting people enjoy something warm and satisfying together.
Timing and Make-Ahead Strategy
The beauty of this recipe is that you can bake the potatoes and scoop them hours in advance, then just top and finish them 15 minutes before serving. I've even brushed and crisped the shells in the morning, stored them in an airtight container, and reheated them gently in a 350°F oven for five minutes before loading them with toppings. The skins stay remarkably crispy if you keep them dry and protected from steam.
Flavor Variations That Actually Work
Once you've made these the classic way, it's fun to experiment with different cheese blends—I've had good success mixing sharp cheddar with a little pepper jack for heat, or using extra-sharp white cheddar for a tangier bite. Some people swap in crumbled sausage instead of bacon, or add a tiny bit of cooked diced jalapeño between the cheese and bacon. The structure stays the same; you're just playing with what goes inside.
The Serving Sweet Spot
These are genuinely best served within five minutes of coming out of the oven, while the skins are still crispy and the cheese still has that glossy, barely-set look. If you're making them for a group, figure out your timing so the last batch comes out just as people are gathering. Fresh salsa, guacamole, or even a simple sour cream dip on the side gives people options without overshadowing the main event.
- Have everything prepped and ready to go before you start baking—this recipe moves fast at the end.
- If you're doubling the batch, use two baking sheets so the skins cook evenly with good air circulation.
- Leftover skins can be reheated in a 350°F oven for about eight minutes, though they're honestly best fresh.
 Save to Pinterest
 These potato skins are proof that some of the best things to cook are the ones that let quality ingredients shine without demanding too much technique. They've become my go-to whenever I want to feel like I've put in effort without actually stressing about it.
Common Recipe Questions
- → How do you achieve crispy potato skins?
After baking potatoes until tender, scoop out the flesh and bake the skins again at a higher temperature brushed with olive oil to get crispy edges.
- → Can I make these without bacon?
Yes, omit bacon or use a plant-based alternative to suit dietary preferences while keeping the cheesy filling.
- → What cheese works best for filling?
Sharp cheddar provides a rich flavor, but Monterey Jack, mozzarella, or pepper jack can be delicious alternatives.
- → How should these be served?
They’re best served hot, topped with sour cream and fresh chives, making a perfect snack or appetizer for gatherings.
- → Are these gluten-free?
Yes, using certified gluten-free ingredients ensures the dish remains gluten-free, despite the savory toppings.