 Save to Pinterest
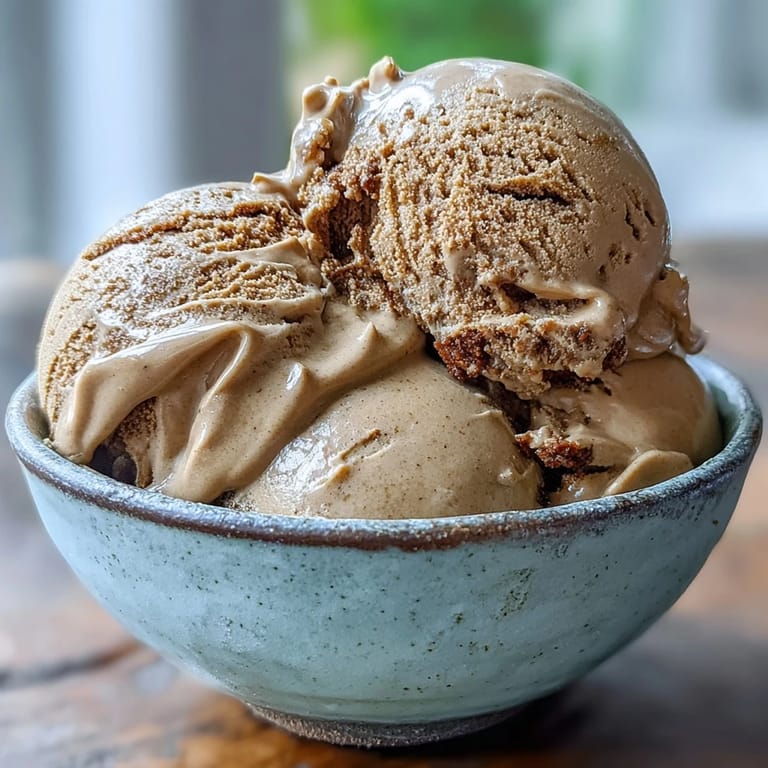
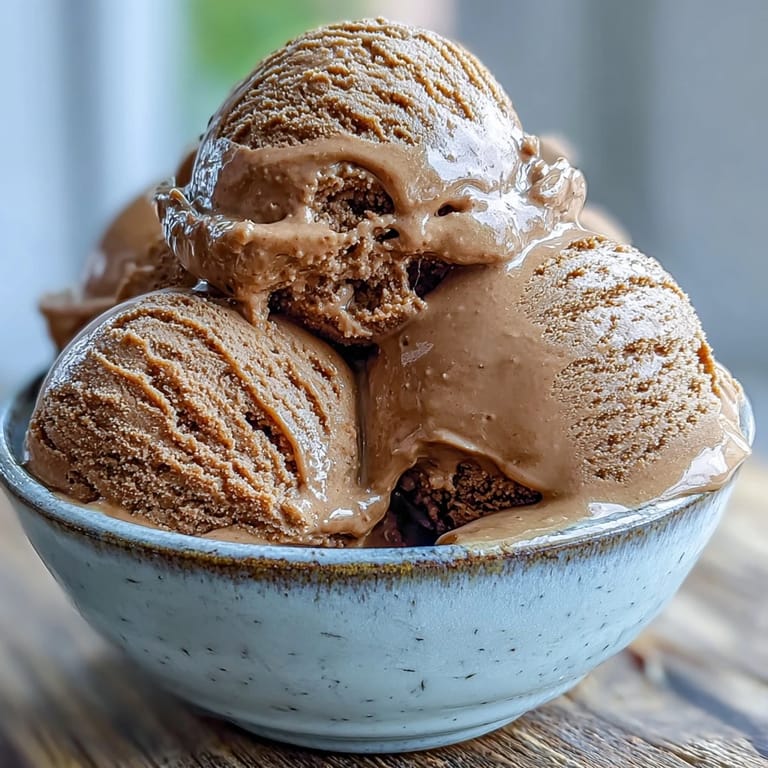
 There's something about the first spoonful of hojicha ice cream that stops you mid-conversation. I discovered it at a small tea house in Kyoto, where the owner served it in a delicate ceramic cup, still slightly soft from the churner. The flavor hit differently than anything I'd made before—earthy and caramel-like, with that toasted complexity that whispered rather than shouted. When I finally decided to recreate it at home, I realized this wasn't just ice cream; it was an invitation to slow down and taste something genuinely elegant.
I made this for my sister's birthday dinner last summer, when the heat made everyone reluctant to gather in the kitchen. Serving homemade hojicha ice cream felt like bringing a piece of calm to the table, and watching her eyes light up when she tasted that first spoonful made every minute of chilling time worthwhile. That night, the ice cream became the conversation, not just the dessert.
Ingredients
- Heavy cream and whole milk: The pairing creates a custard base that's rich without being heavy, allowing the subtle tea flavor to shine rather than getting buried.
- Hojicha loose leaf tea: Choose whole leaf over dust or fannings if you can find it; the flavor is cleaner and more refined, and the leaves won't slip through your sieve.
- Egg yolks: Fresh eggs matter here more than anywhere else you'll use them, since they're barely cooked and carry the entire texture of your ice cream.
- Granulated sugar: The sweetness needs to be precise enough to highlight rather than mask the tea's character; don't improvise with honey or other sweeteners on your first attempt.
- Fine sea salt: Just a pinch awakens the deeper notes of hojicha and prevents the ice cream from tasting one-dimensional.
Tired of Takeout? 🥡
Get 10 meals you can make faster than delivery arrives. Seriously.
One email. No spam. Unsubscribe anytime.
Instructions
- Warm the cream and milk gently:
- Combine them in a saucepan and heat over medium until you see wisps of steam rising and tiny bubbles forming around the edges, but don't let it actually boil. This matters because boiling can make the custard grainy later.
- Steep the hojicha with intention:
- Add the tea, lower the heat, cover the pan, and let it sit for exactly ten minutes. The gentle warmth coaxes out that roasted, almost chestnut-like complexity without bitterness.
- Strain with care:
- Pour the mixture through a fine sieve and gently press the soggy leaves with the back of a spoon to release every drop of flavor. Return the infused liquid to your saucepan.
- Whisk the yolk mixture:
- In a separate bowl, combine egg yolks, sugar, and salt, whisking for a couple of minutes until the mixture becomes pale and falls from the whisk in a slow ribbon. This aeration is what gives your ice cream that silky texture.
- Temper the yolks slowly:
- Here's where many people rush and end up with scrambled egg ice cream. Pour about one cup of the warm hojicha mixture into your yolks while whisking constantly, then pour this yolk mixture back into the saucepan with the remaining hojicha milk.
- Cook the custard to perfection:
- Stir constantly with a wooden spoon over low heat until the mixture coats the back of the spoon and a finger drawn across leaves a trail. Use a thermometer to hit 170-175°F (77-80°C) if you're uncertain; this temperature pasteurizes the eggs without overcooking them.
- Cool and chill thoroughly:
- Strain the custard into a clean bowl to catch any bits of cooked egg, then let it cool to room temperature before covering and refrigerating for at least four hours. This step transforms the flavor as it rests, so don't skip it.
- Churn with your ice cream maker:
- Follow your machine's instructions, which usually means churning for twenty to thirty minutes until the mixture reaches soft-serve consistency. The hojicha flavor will come alive as it freezes.
- Freeze until scoopable:
- Transfer to an airtight container and freeze for at least two more hours so the ice cream firms up enough to scoop cleanly. You're building layers of flavor and texture with every hour it sits.
 Save to Pinterest
 I once served this ice cream to a neighbor who claimed she didn't like tea, and her skepticism melted faster than the scoop I'd given her. There's something about hojicha's quieter elegance that wins people over who think they've already decided what they do and don't enjoy. That moment reminded me why I keep coming back to this recipe.
The Magic of Hojicha
Hojicha is green tea leaves that have been roasted until they turn a warm brown and lose most of their grassy notes. This roasting process is what gives hojicha its signature nutty, almost coffee-like depth without any bitterness, making it perfect for ice cream where every flavor needs to feel approachable. The tea brings sophistication without demanding an acquired taste, which is why this dessert works whether you're serving it at a dinner party or eating it alone on a weeknight.
Customizing Your Bowl
Once you've mastered the base, the garnishes are where you can play. I've topped it with toasted sesame seeds for a nutty crunch, drizzled sweetened condensed milk for extra indulgence, and served it alongside fresh mango for brightness that lets the hojicha shine even more clearly. Some afternoons I simply serve it plain in a chilled bowl, letting the ice cream speak for itself, which honestly is often the best way.
Storing and Serving Wisdom
Homemade ice cream melts faster than store-bought because it lacks stabilizers and gums, so scoop straight from the freezer and serve in chilled bowls if you have time. If the ice cream becomes too hard, leave it at room temperature for three to five minutes until you can scoop it comfortably; this brief softening actually makes the hojicha flavor more apparent on your palate. Don't keep it longer than two weeks, though the flavor starts fading after about ten days as the tea's delicate notes dull with time.
- Pair it with fresh fruit, mochi, or even a small shortbread cookie to balance its creamy richness.
- If you don't have an ice cream maker, freeze the chilled custard in a shallow pan and stir it every thirty minutes for three hours until fluffy and frozen.
- A tiny pinch of matcha powder stirred into the custard before churning adds visual interest and an extra layer of tea flavor without overpowering the hojicha.
 Save to Pinterest
 This ice cream has become the thing I make when I want to feel like I've traveled without leaving my kitchen, and the beauty is that every spoonful tastes like intention and care. Once you taste it, you'll understand why hojicha has become my favorite way to end an afternoon.
Common Recipe Questions
- → What does hojicha taste like?
Hojicha offers a distinctive nutty, caramel-like flavor with earthy undertones. The roasting process removes bitterness, creating a naturally sweet, toasty profile that pairs beautifully with cream.
- → Can I make this without an ice cream maker?
While an ice cream maker creates the smoothest texture, you can freeze the custard in a shallow container, whisking every 30 minutes for the first 3 hours to break up ice crystals.
- → How long does this keep in the freezer?
Properly stored in an airtight container, this frozen dessert maintains optimal texture for up to 2 weeks. For best results, let it soften 5-10 minutes before serving.
- → What's the difference between hojicha and matcha?
Both come from green tea, but hojicha is roasted over charcoal at high heat, giving it a reddish-brown color and mellow, nutty flavor. Matcha is shade-grown and steamed, resulting in vibrant green color and grassy notes.
- → Can I substitute the tea with hojicha powder?
Yes, use 2 tablespoons of hojicha powder instead of loose leaves. Whisk it directly into the warm milk mixture until fully dissolved, then proceed with the recipe as written.
- → Why do I need to temper the eggs?
Tempering gradually warms the eggs to prevent curdling when they meet the hot liquid. This technique ensures a smooth, silky custard without scrambled egg bits.